How to relieve pregnancy related sciatica with yoga stretches
Sciatica is something I see coming up time and again in my pregnancy yoga classes and it can cause a huge amount of pain and distress for those who are suffering from it. So I have decided to right a post about how pregnant women can help alleviate their symptoms with some simple stretches and lifestyle changes.
The sciatic nerve runs from the lumbar spine, through the buttocks and down the legs. Sciatica is a condition that is diagnosed when there is pressure or inflammation on the sciatic nerve causing pain and discomfort. From my experience, I think Sciatica is more common amongst pregnant women, then in the general population. However it is also important to note that many pregnant women are incorrectly diagnosed with sciatica when in fact what they are suffering from, is a form of pelvic girdle pain (PGP). PGP shares some of the same symptoms of sciatica but its causes are different and it doesn’t usually extend down into the leg.
If you feel you may be suffering from sciatica it is important see your GP and get an appointment with a chartered Physiotherapist or Osteopath who is experienced in treating pregnant women. You may have sciatica if you have some or all of the following symptoms.
Shooting, stabbing pain or burning sensation running down through one or both buttocks and into one or both thighs and sometimes even down to the calf or ankle. The pain can be intermittent or continuous depending on the severity of the inflammation or the pressure the nerve is under. The pressure can be coming from a bulging disc on the lumbar spine but in pregnancy its more likely caused by the weight of your growing uterus or a very tight piriformis muscle (in the buttock). Sciatica can also cause low back pain.
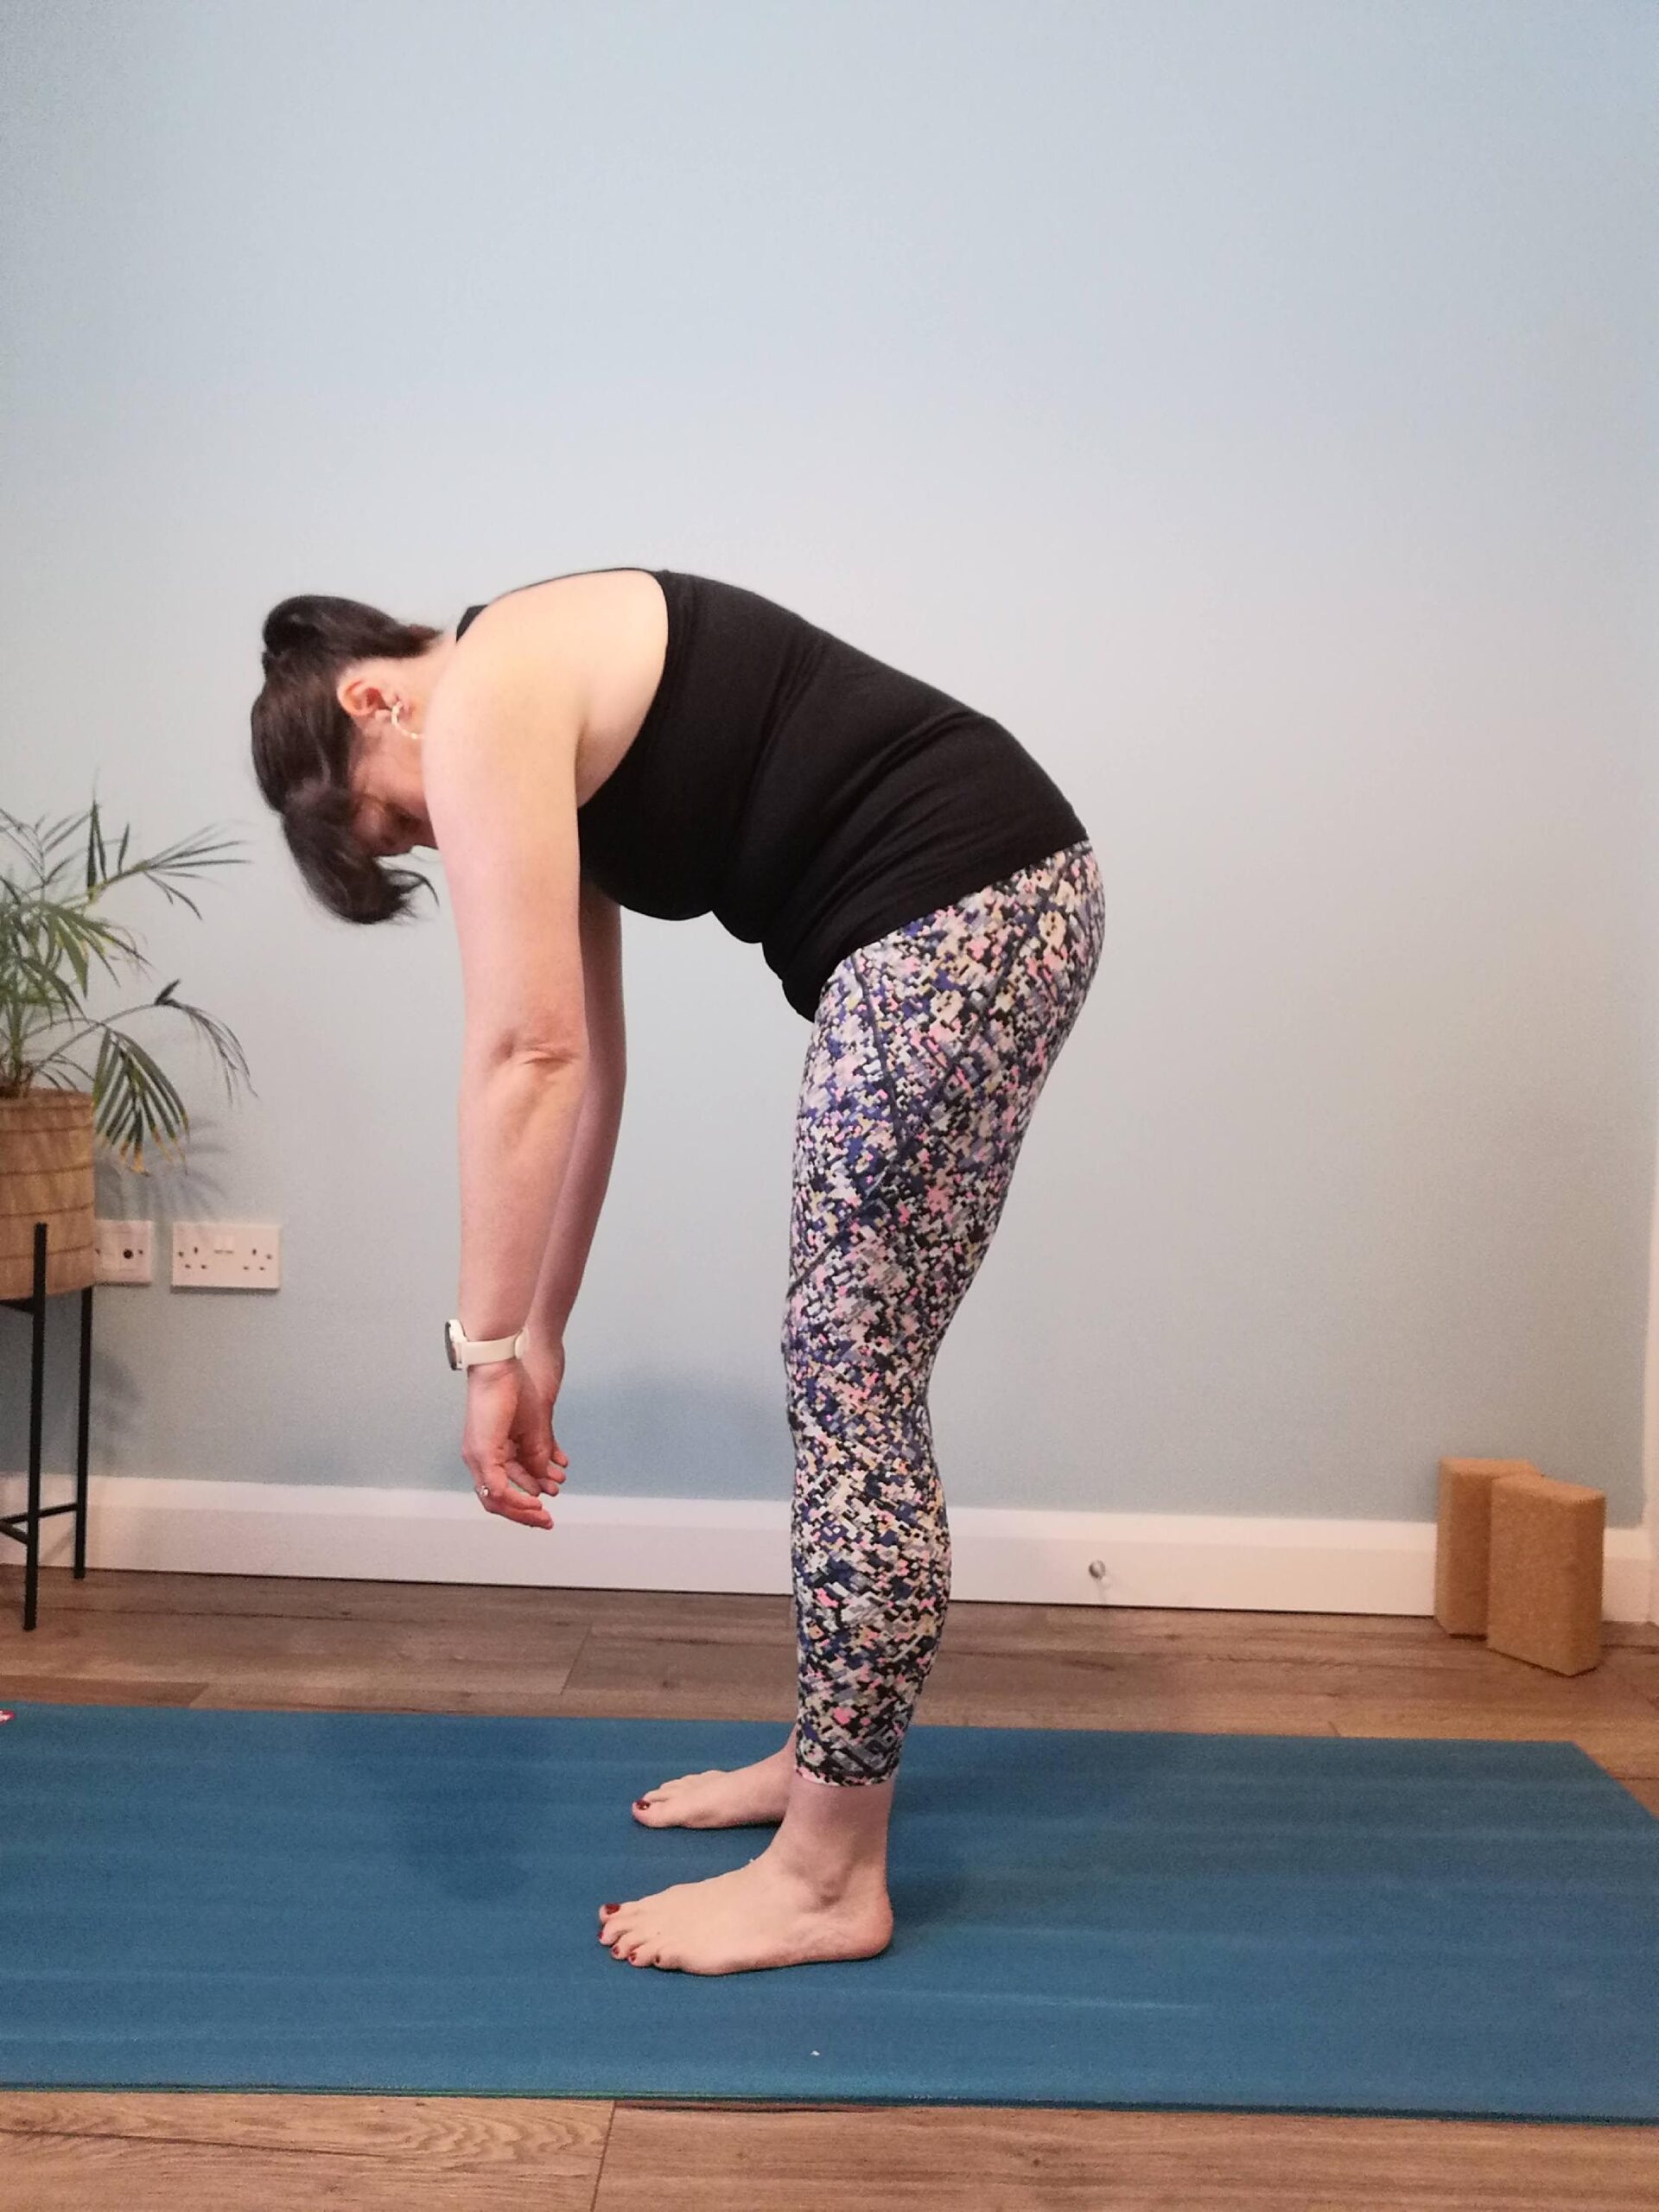
Pregnancy yoga can help ease the symptoms and give some relief if practiced safely and gently. You should also try to avoid heavy lifting and be very careful to keep good posture. A rounded low back can increase the pain. When bending down the back should stay straight and the knees should bend. Pain is also increased by long periods of sitting so sitting on a yoga/exercise ball and avoiding slouching into a couch or chair can help alot. As can the use of a pregnancy pillow between the legs in while sleeping. In some cases a pregnancy girdle/support belt might be appropriate.
The following series of poses should offer some relief. If you feel pain at any point while doing these exercises stop immediately and rest.
For maximum benefit try to do this sequence every day if possible
- Cat Pose
Come on to your mat on all fours.
If your knees hurt place a blanket under them for support.
If your wrists hurt double over the mat or come up on to your fists
Start with a neutral spine and pelvis
As you exhale round your spine and hug your baby into your body as you bring your chin to chest and feel your shoulder blades separate on your back
As you inhale come back to neutral
Continue for at least 10 breaths
For an extra challenge engage your pelvic floor muscles with each exhale and release again on the inhale


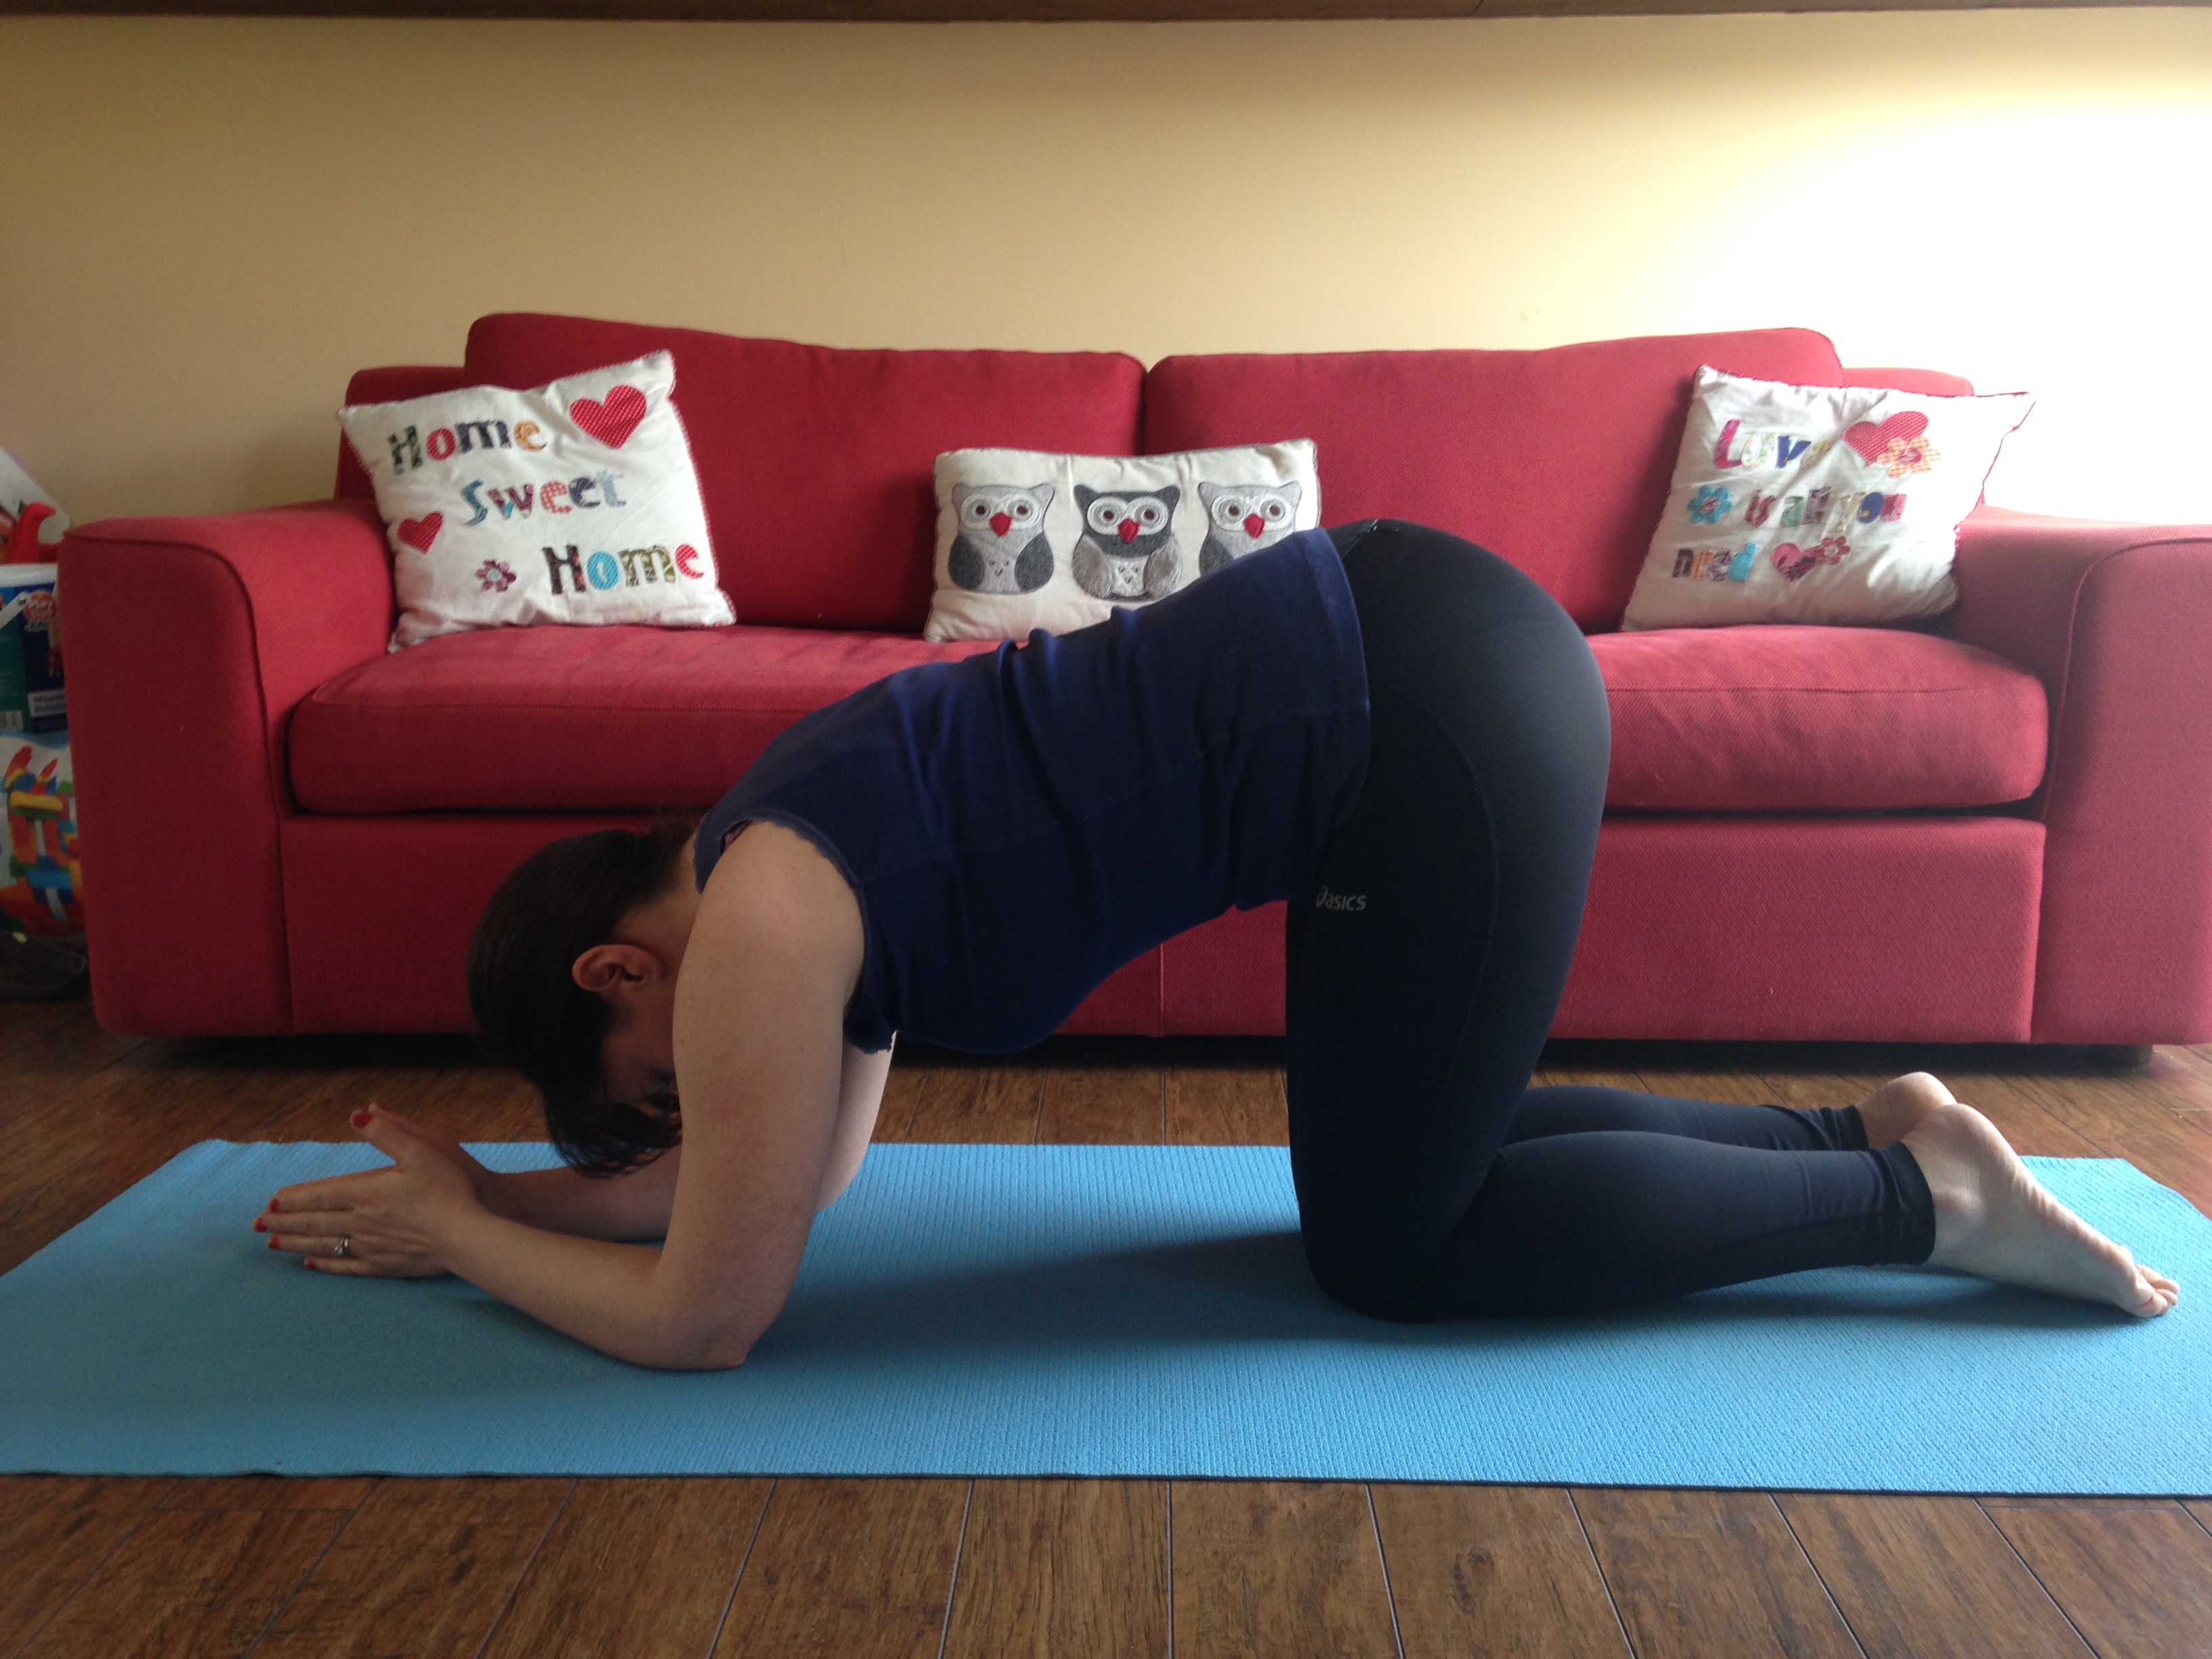
2. Childspose
Make sure your big toes are touching and separate your knees as wide as you need to make room for your baby
Hinge forward on your hips bring your forehead to rest on the mat or on your stacked fists
Relax your tummy and your lower back and let your hips soften and open
Stay here for at least 10 breaths
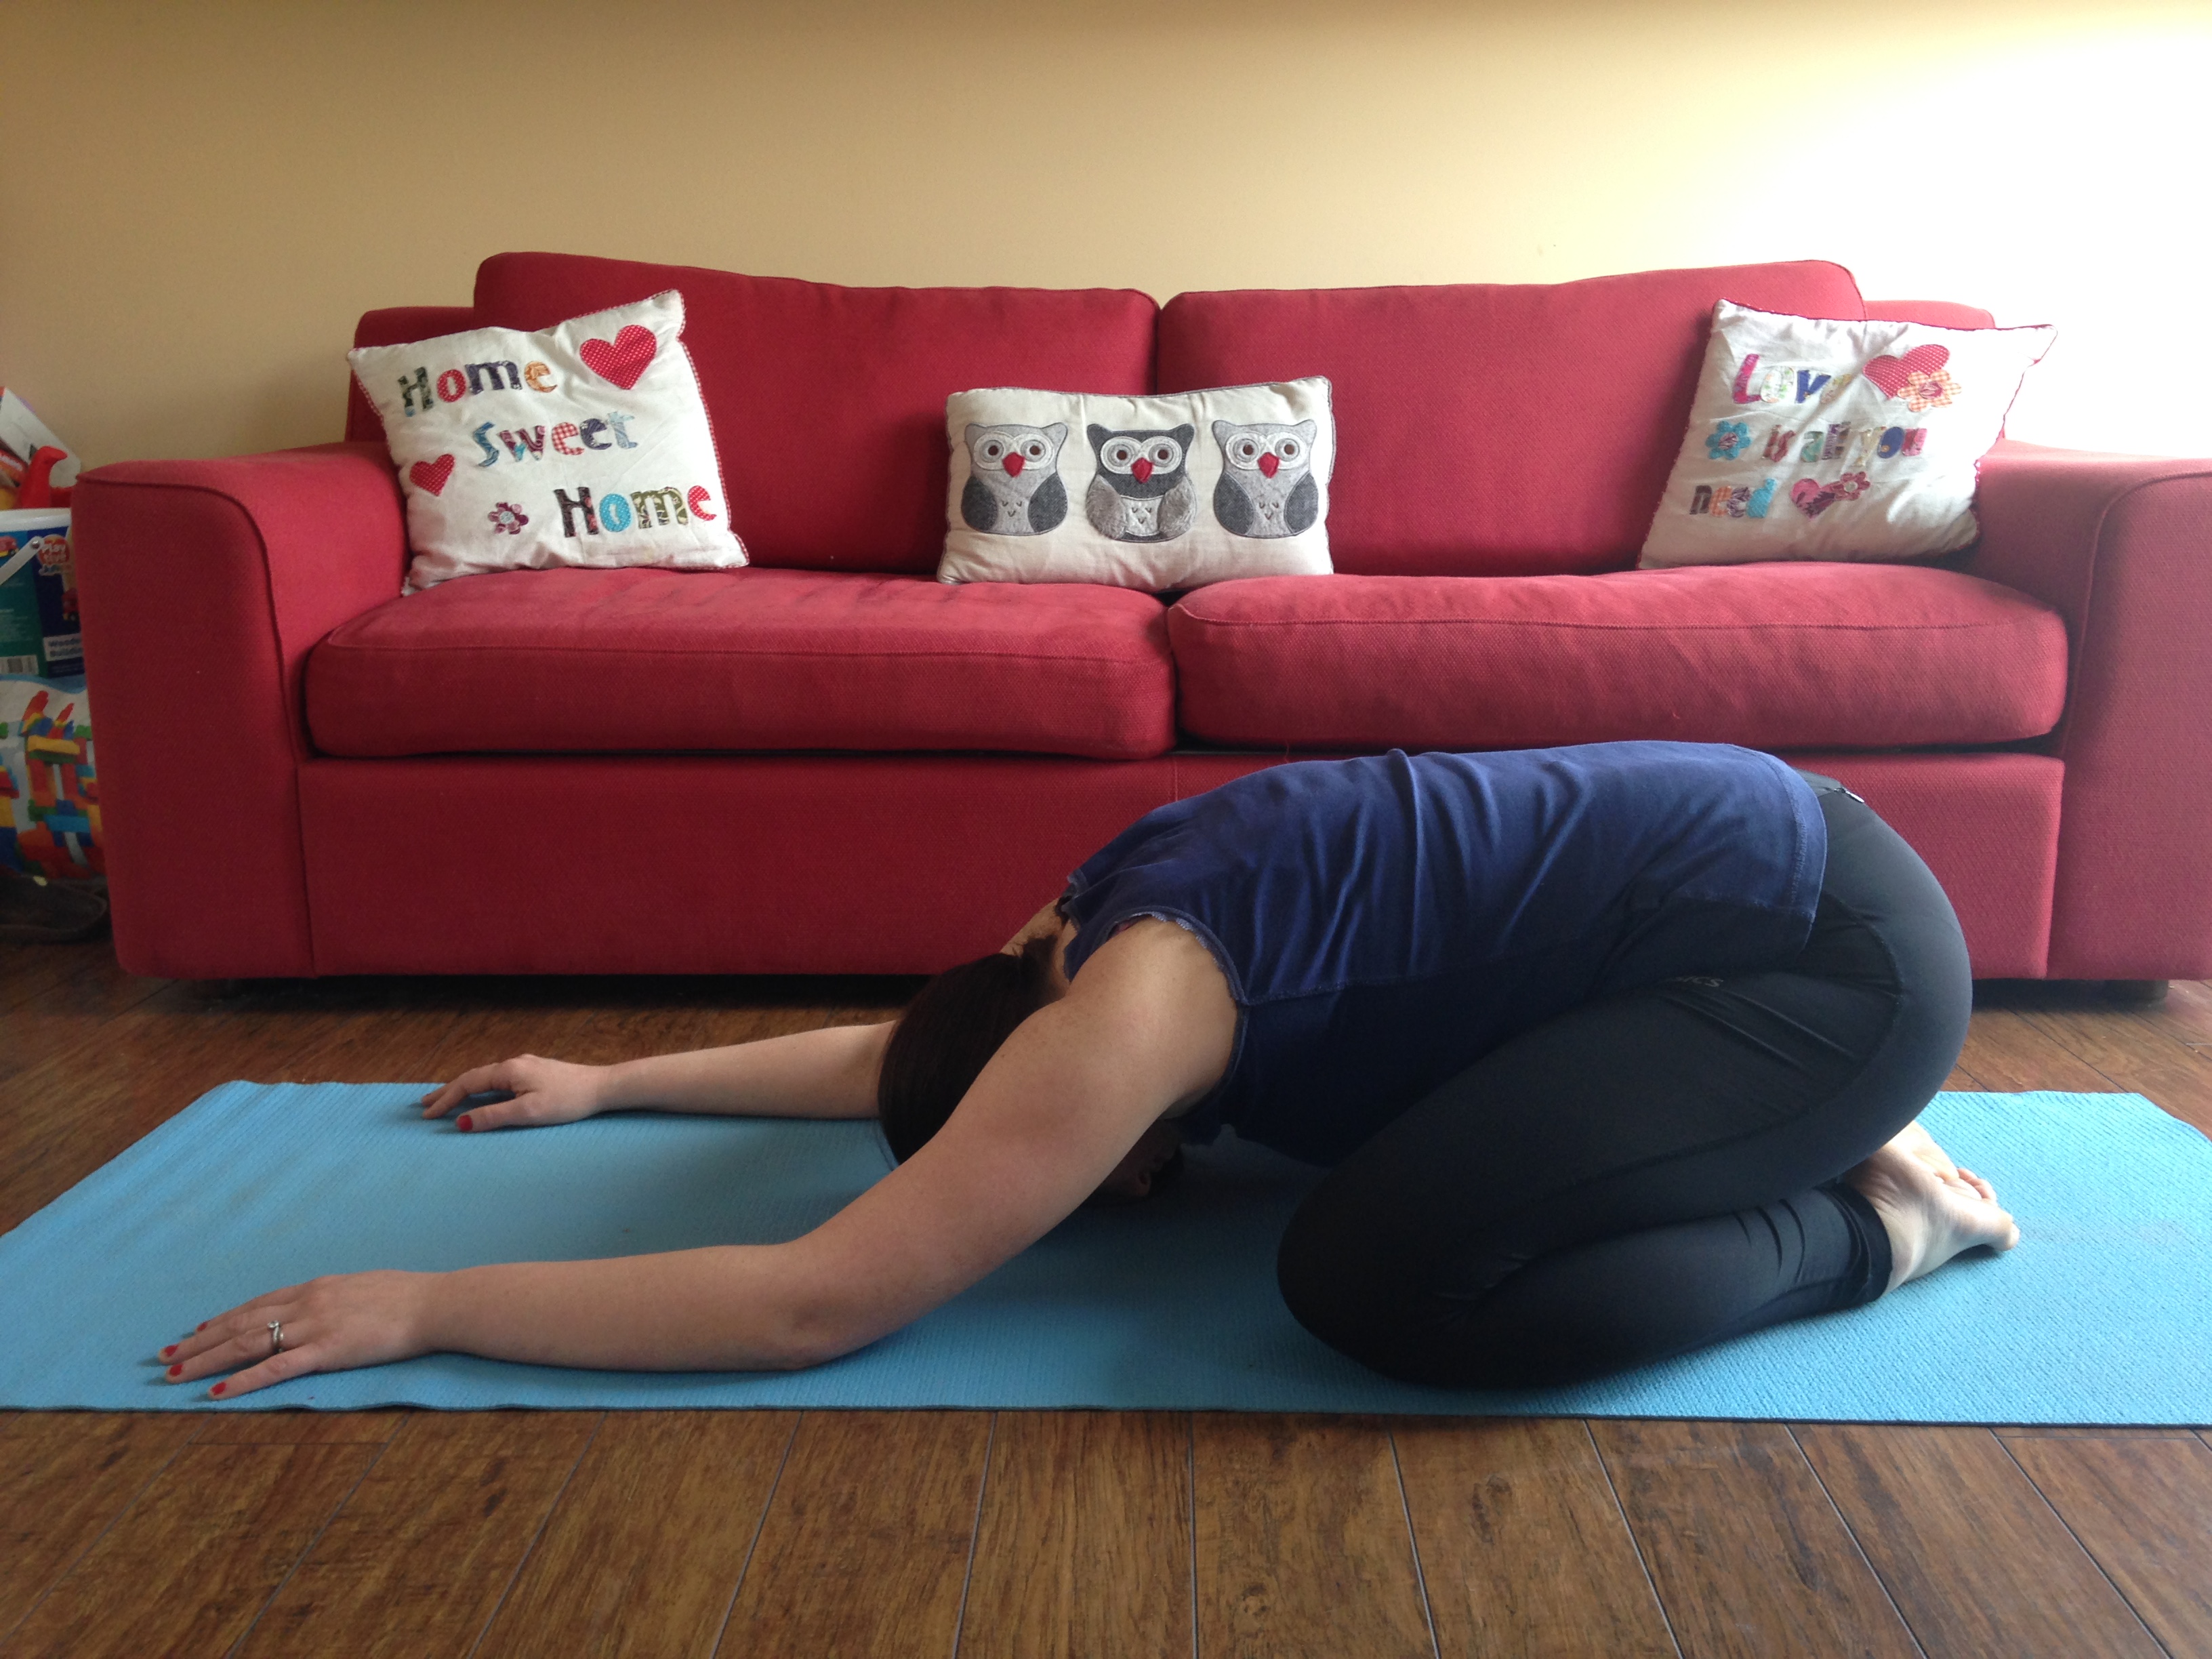
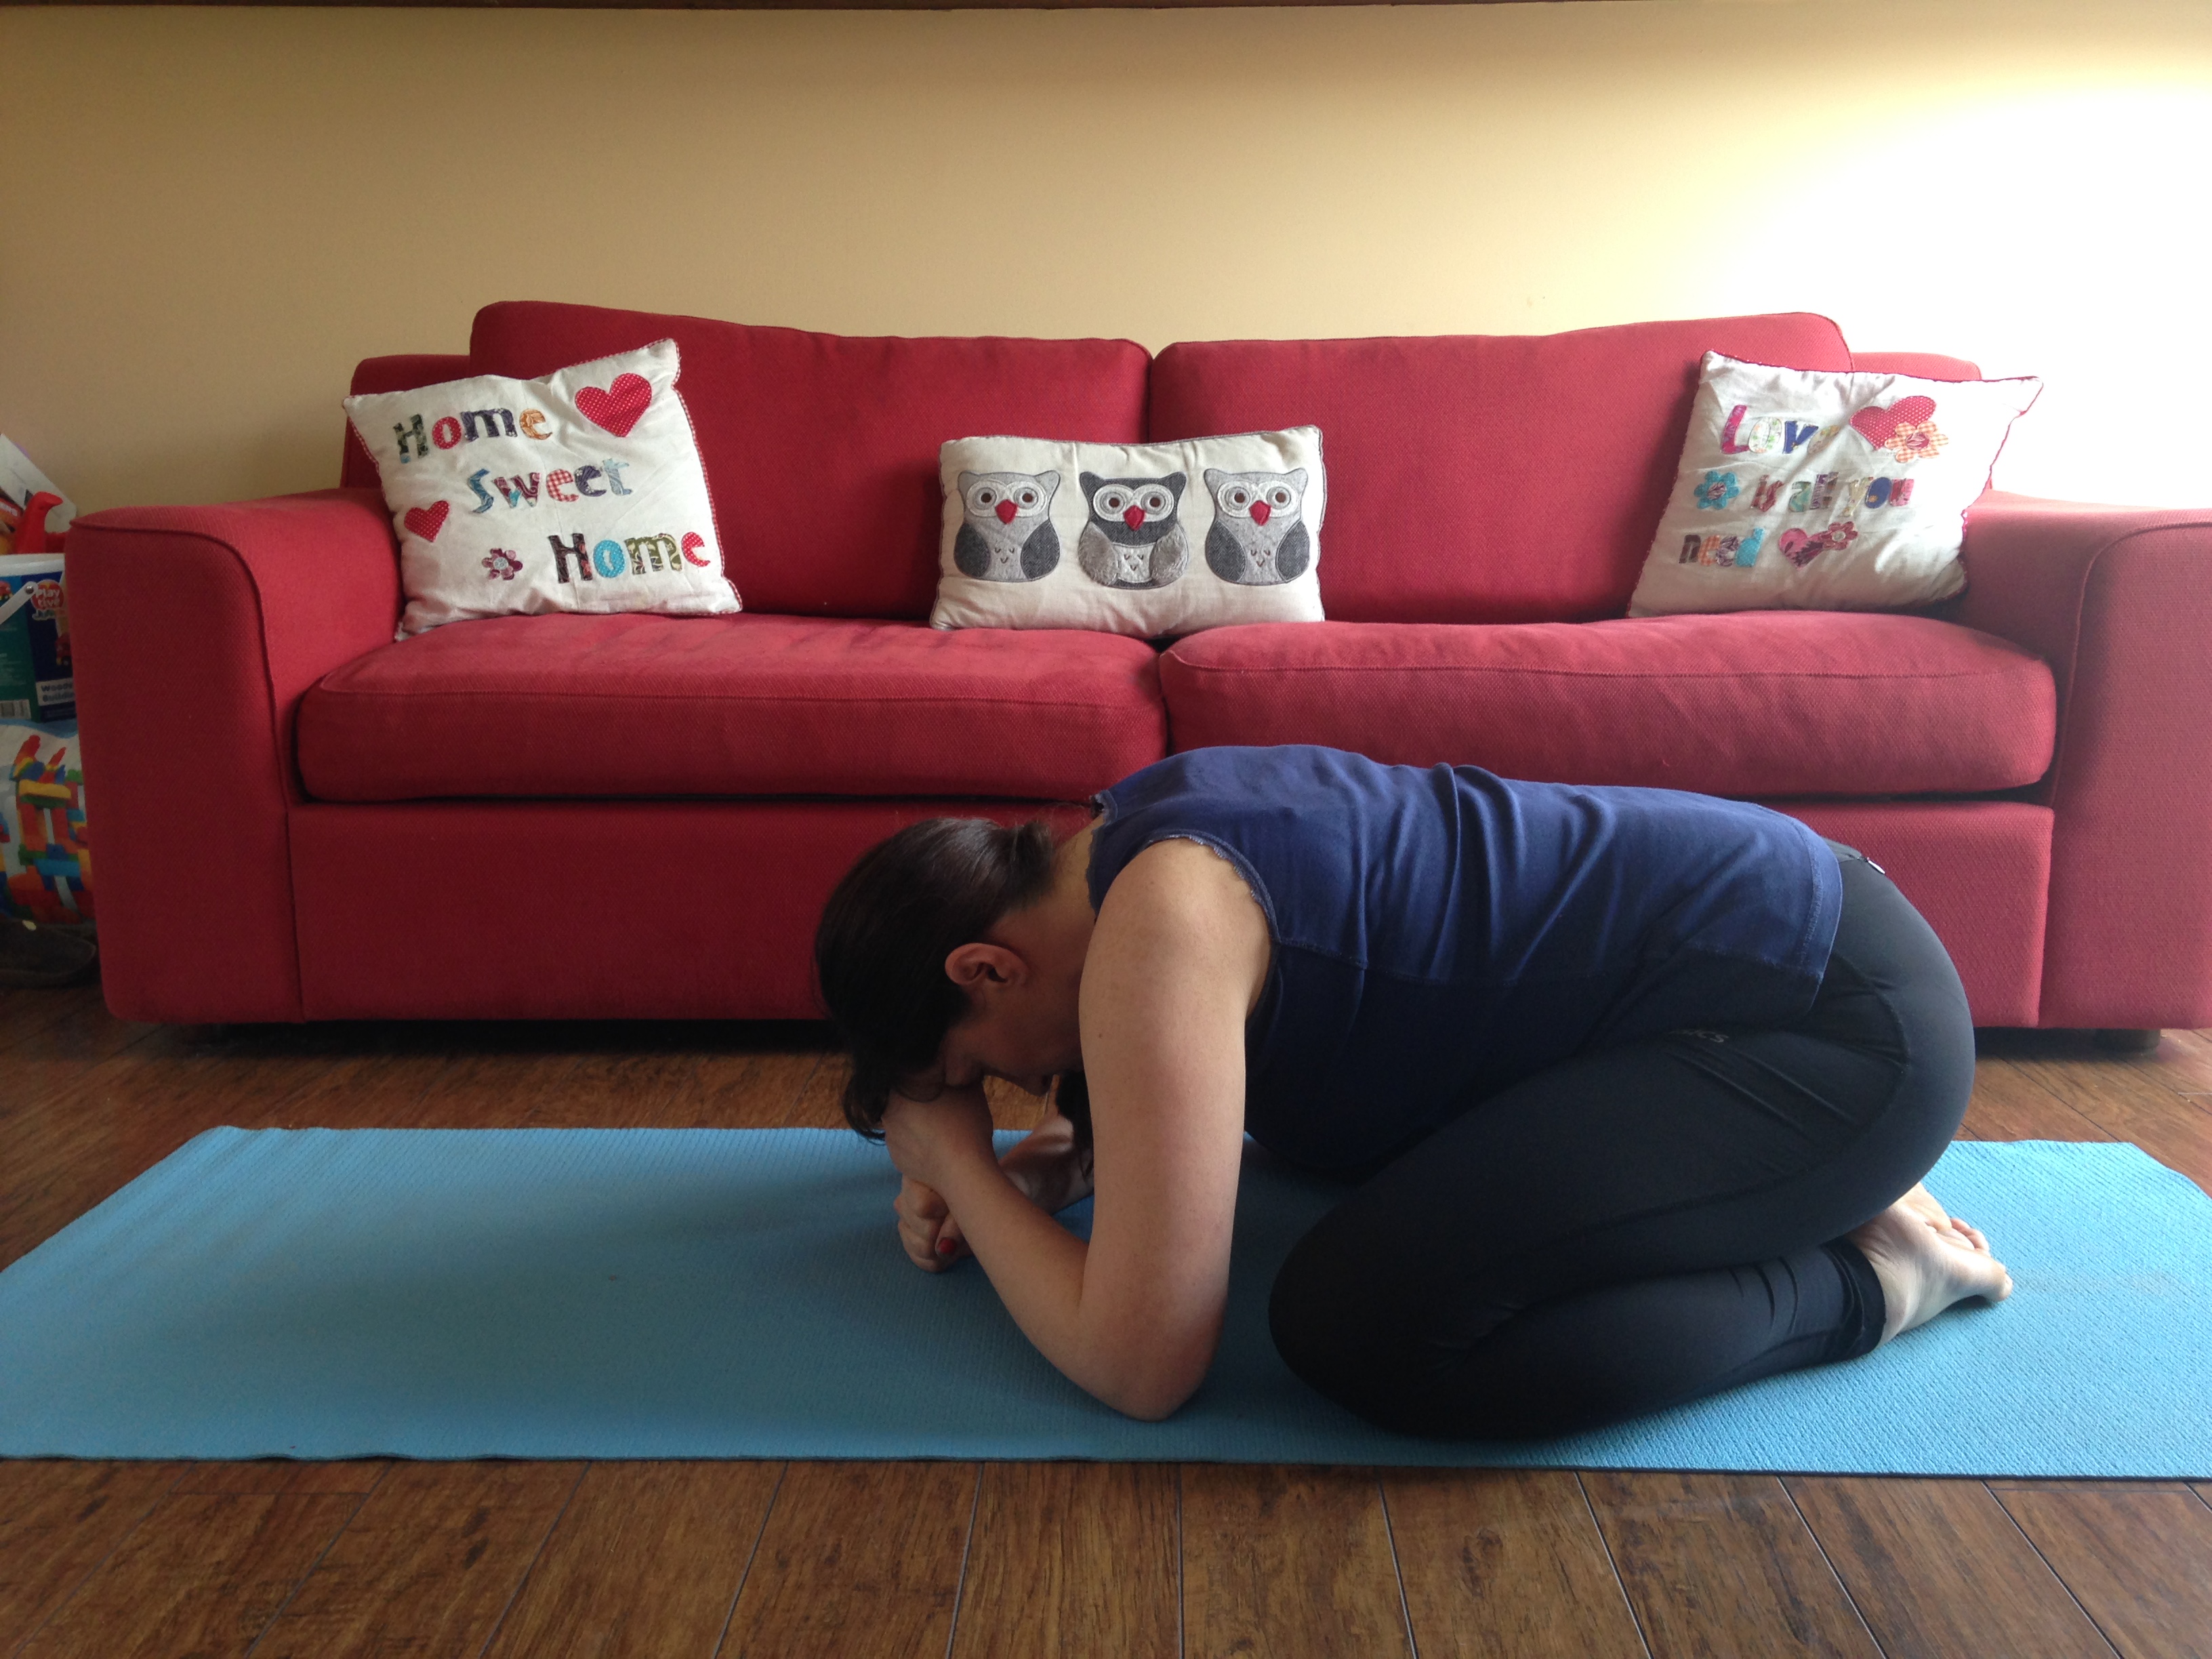
If this pose is uncomfortable bring the knees together and keep the bum in the air
3. All fours side stretch
Starting in all fours table top position, walk your hands out to the right side as far as is comfortable for your
Hold and feel the stretch on your left side while focusing on the breath
Rock forwards and backwards a few times feeling the release and stretch in the spine and back
Repeat on the left side
Return to a few rounds of cat pose again
4. All fours hip circles
From all fours, move your bum back towards your heels
Inhale your hips around to the right and to the front
Exhale (a big sighing breath out through the mouth) moving your hips around to the left and back
Continue circling the hips here in a rhythmic, relaxing way
After a while reverse and go the other way
When you are done, sink back to childs pose again for a few breaths
5. Pigeon Pose
Starting from all fours draw your right leg forward bring your right knee to where your right hand is
Your right foot is pointed and placed under your left thigh.
If your feeling any discomfort in the right knee, try flexing your big toe and/or your baby toe
If your knee continues to be in pain, come out of the pose
Check that your right knee is either in line with your right hip or slightly wider.
Extend the left leg backwards letting your hips sink towards the floor as much as feels comfortable
You may find it more comfortable to place a folded blanket or a cushion under your right hip
You should be able to breath comfortably and relax into the stretch. If its too much, back off a little.
If your wrists are sore, come on to your fists instead.
Lengthen through the front of your body and look forward
Relax the lower back, buttocks and pelvic area
Release the tailbone towards the floor
Take care not the sink down on one side – keep the hips level
Hold here for at least 5 breaths
Depending on the size of your bump and your comfort levels see if you can fold forward, coming onto your forearms and gazing down at the mat.
If this is too much, or you don’t have enough space stick with the first part of the pose.
To come out of the pose, come back up on to your hands, walk the left leg closer to your hands until you can move your right knee back and come back into all fours.
Repeat on the other side.
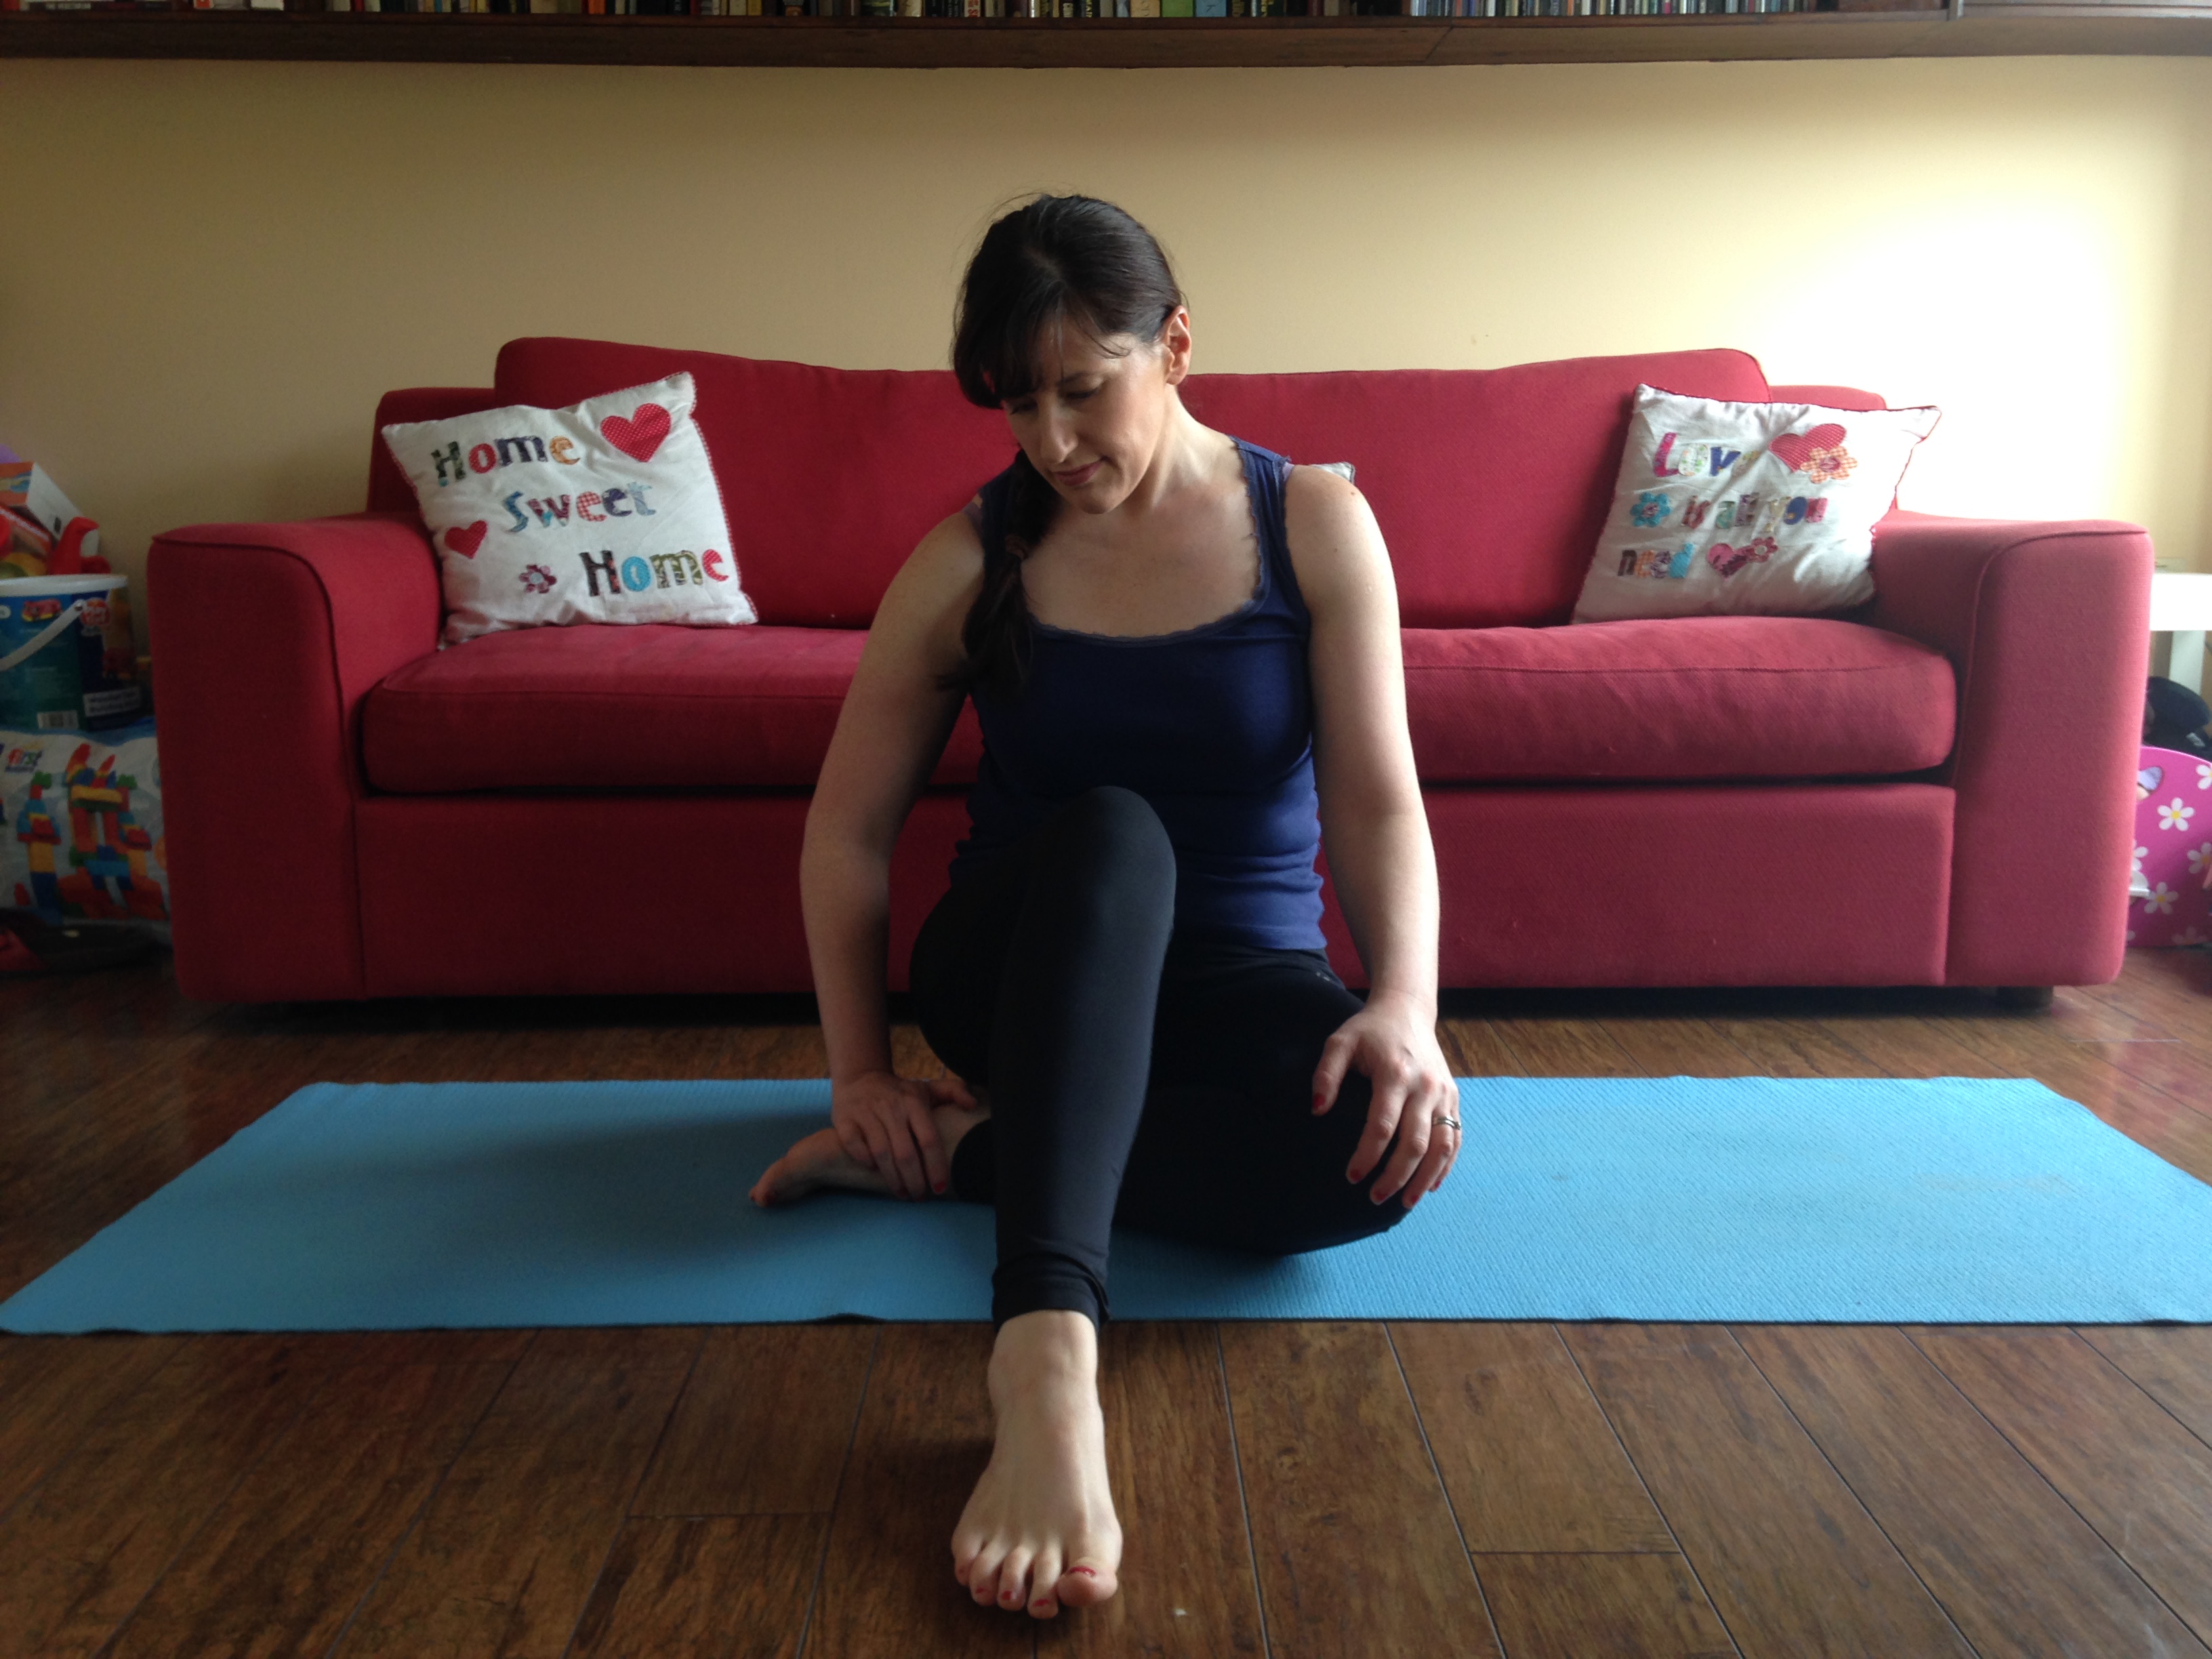
6. Cowface pose
Come to a seated position with your bum and pelvis raised up on a block, cushion or folded blanket and your bent legs out in front.
Draw your right foot under your left thigh, bringing the right knee to the floor
Cross your left leg over your right. This may be far enough, or you may feel you are able to bring the left knee more in line with the right knee.
Keep both feet flexed and engaged to protect your knees
Let both buttocks sink into the cushion or mat, don’t allow one buttock to stay raised and tense.
Soften and release the lower back and buttocks as much as you can with each breath.
If your baby bump is small place your hands on your knees and keep your spine erect
If your bump is bigger place your hands on the floor a couple of inches behind your hips leaning back to give your baby more space.
Unravel carefully and repeat on the other side

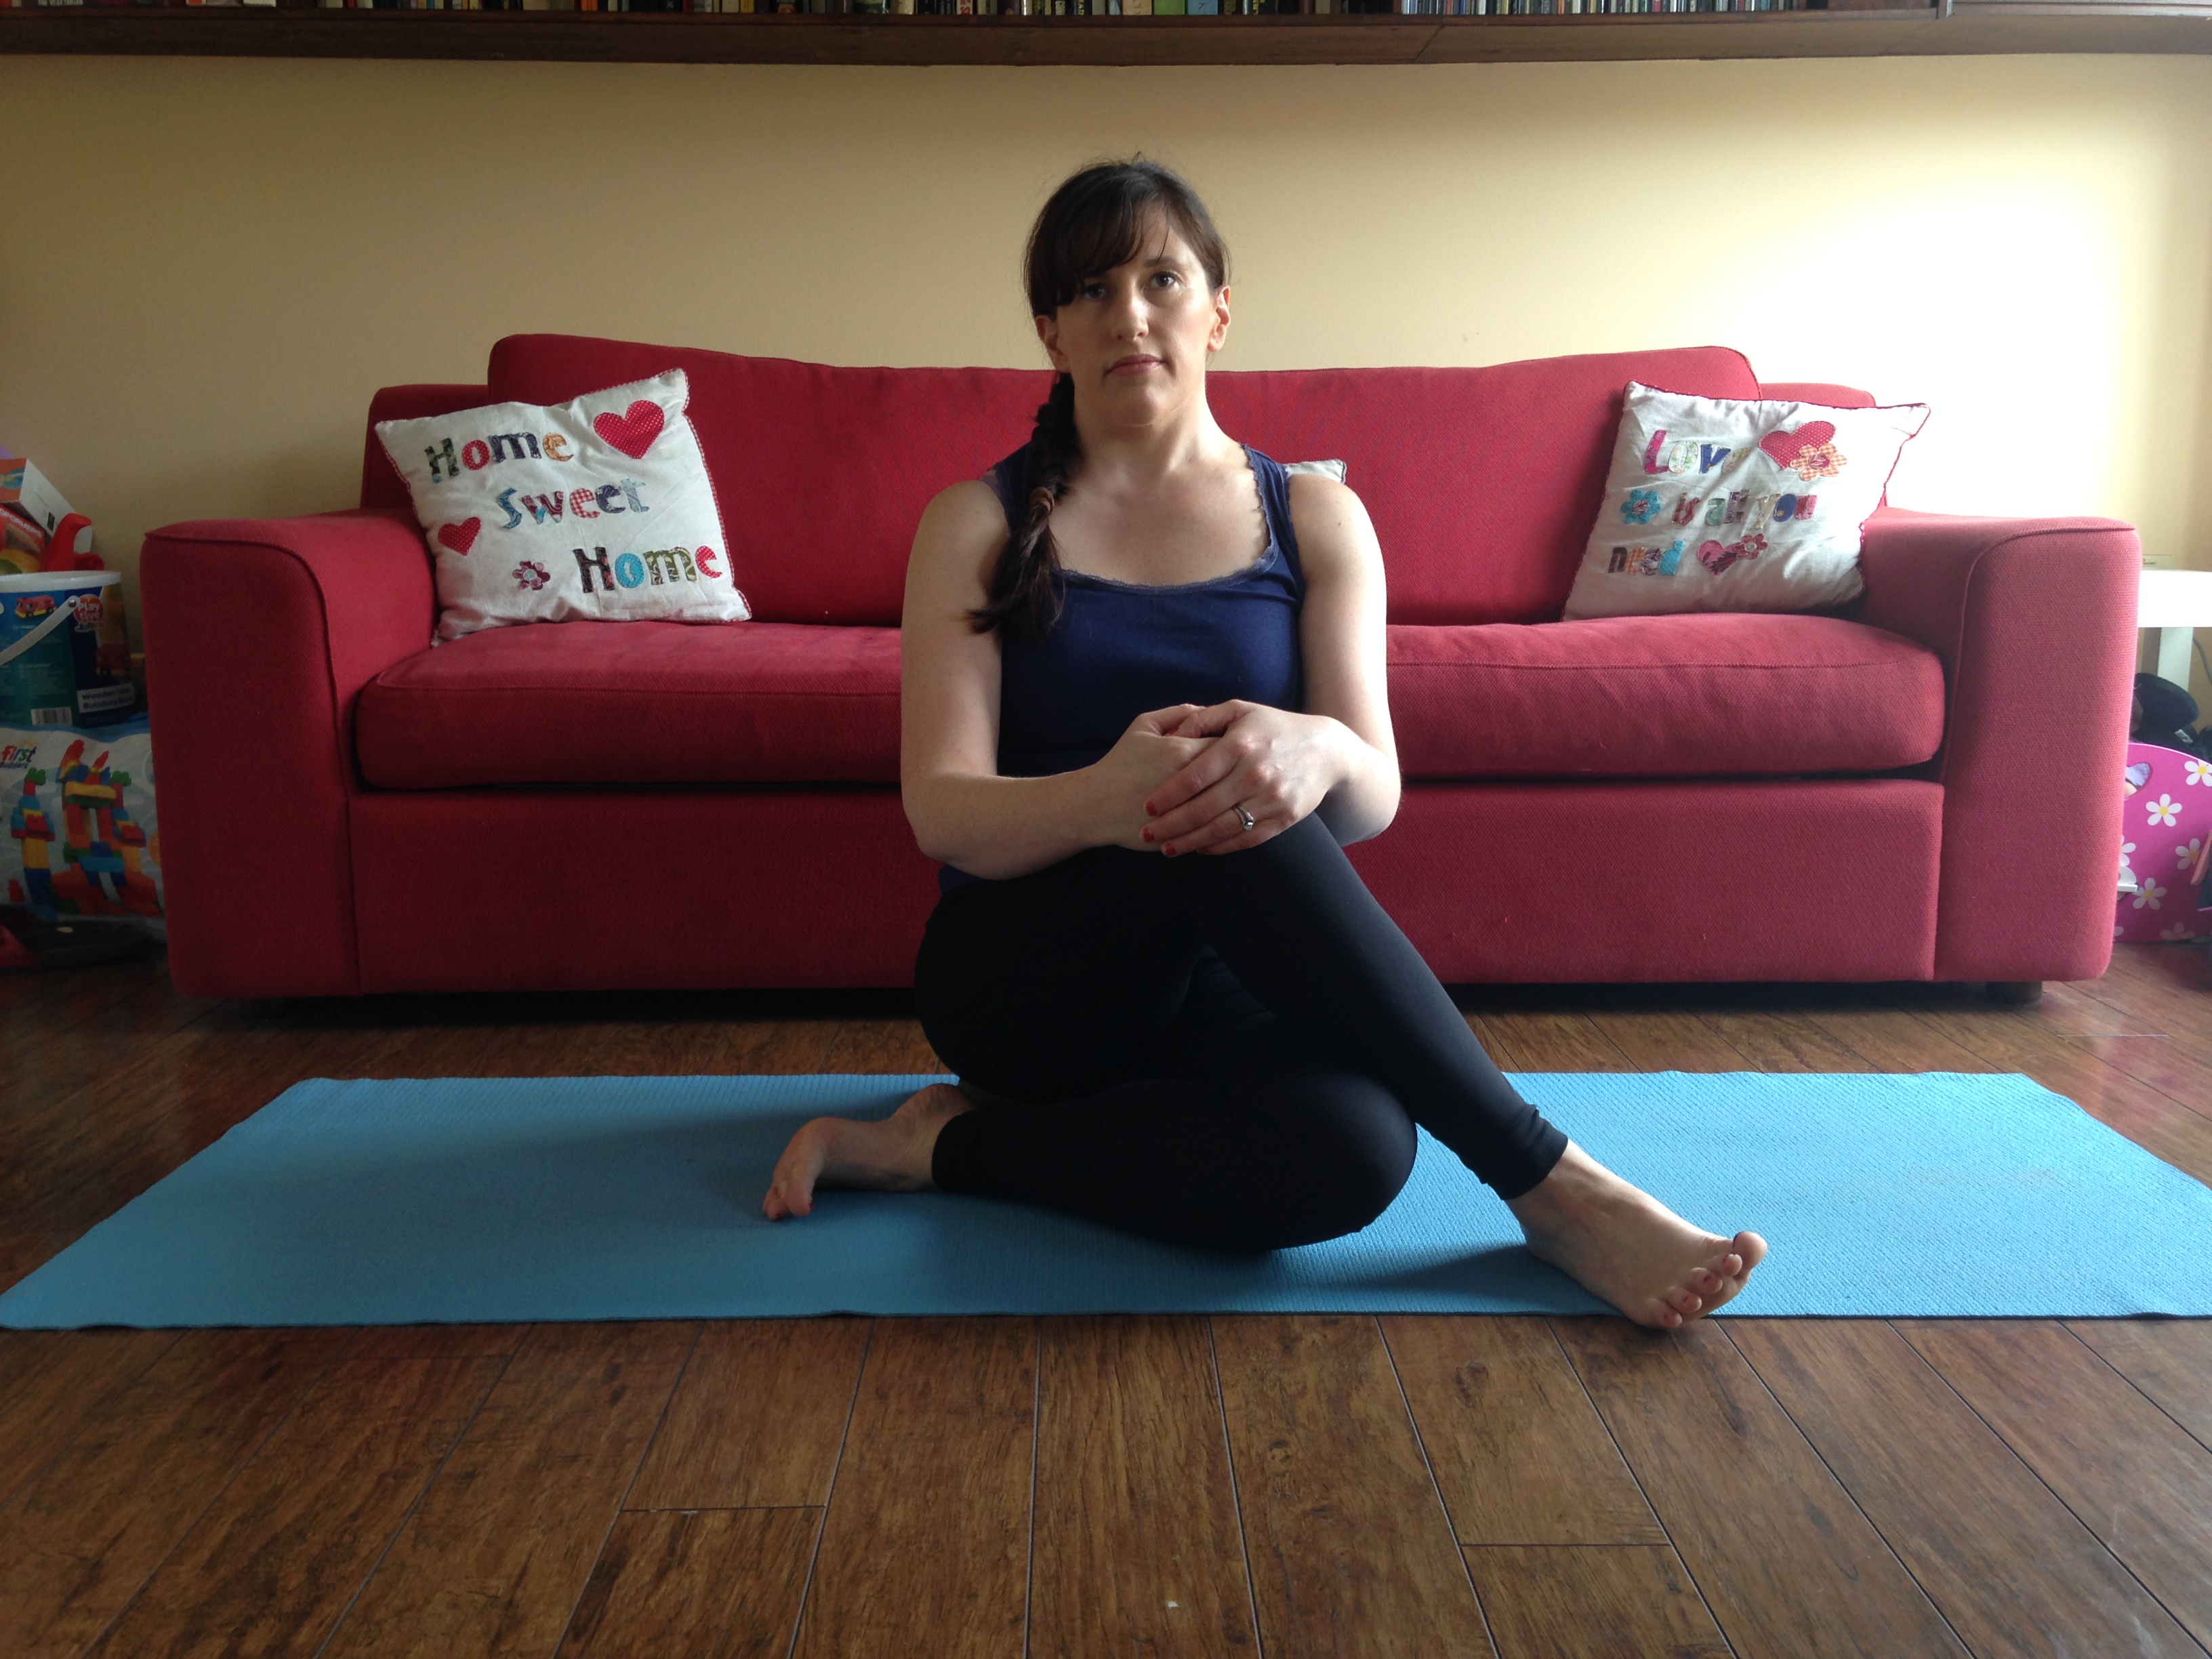
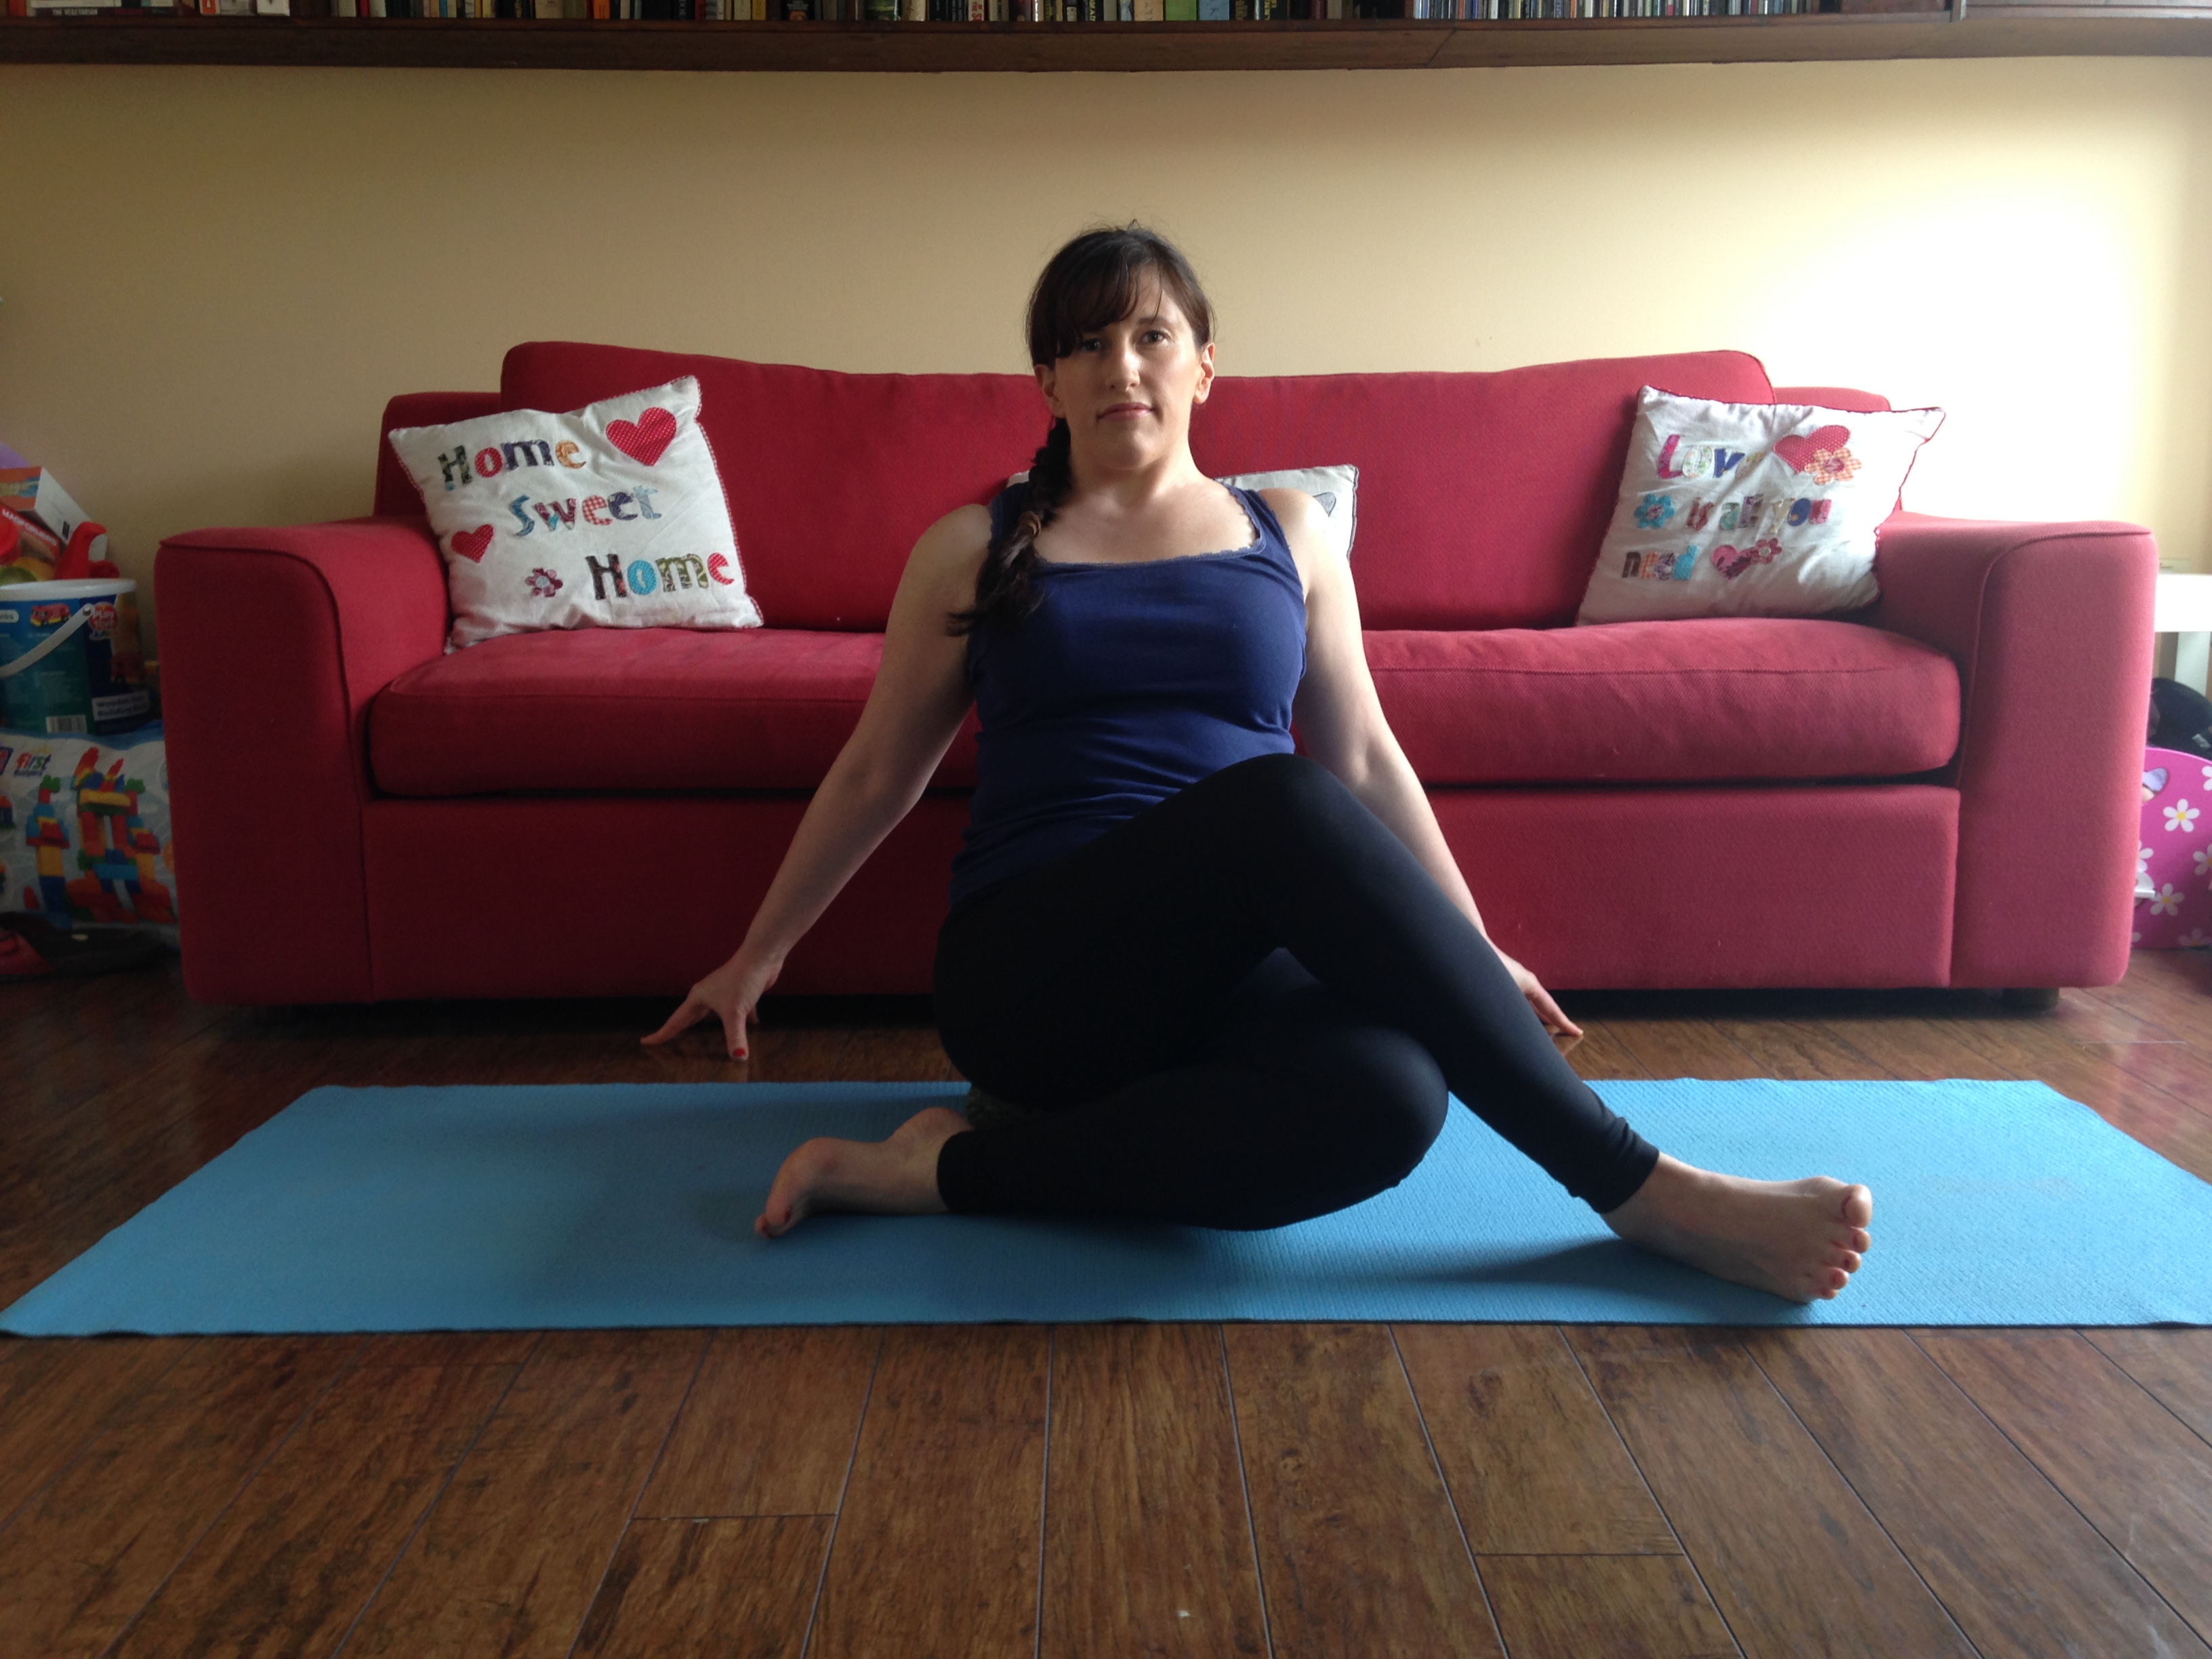
7. Seated Gate Pose
Sit on a cushion or folded blanket with your legs extended in front of you
Separate your legs a bit wider then hip distance
Draw your right foot in to rest against your left leg
Extend your left arm to rest on your left leg
Inhale and stretch your right arm into the air
To protect your lower back, hug your baby in slightly
Exhale and stretch your right arm over to the left.
Hold and breath feeling a stretch on the right side of your body
If you back is still hurting soften the pose until you find a space you can hold and breath in without causing discomfort
To come out of the pose inhale and raise your right arm back up, exhale and release from the pose
Repeat on the other side
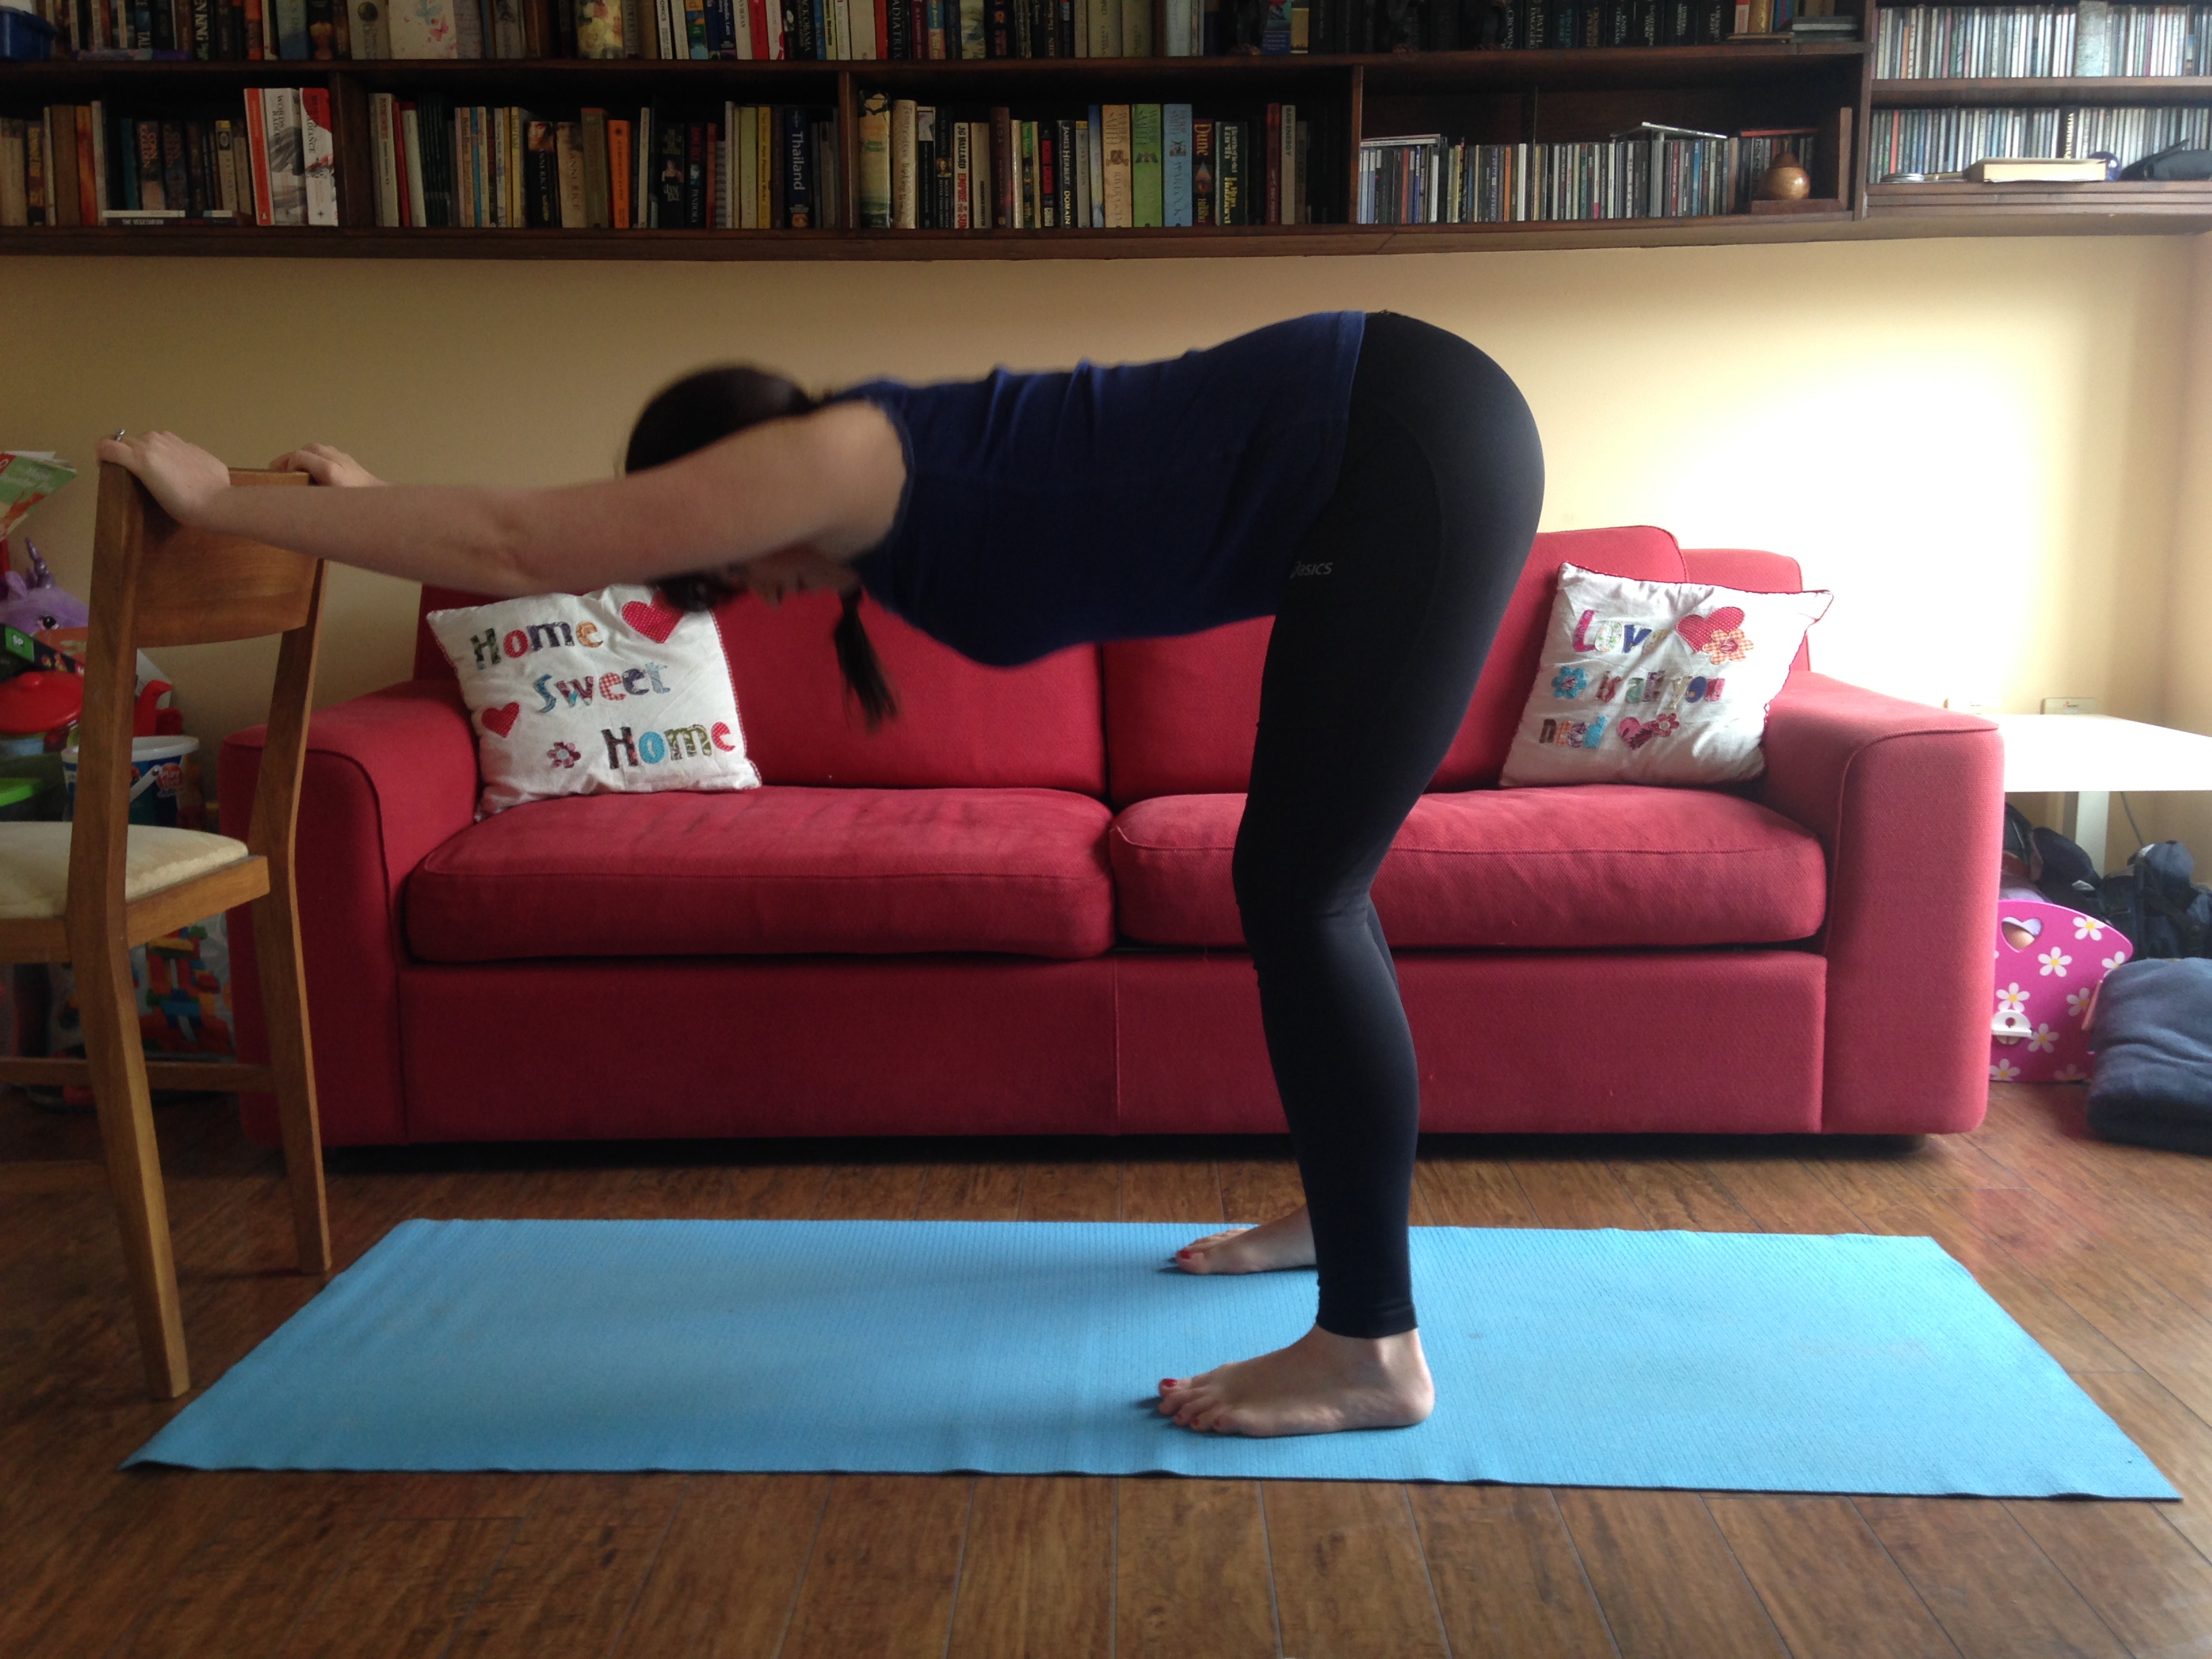
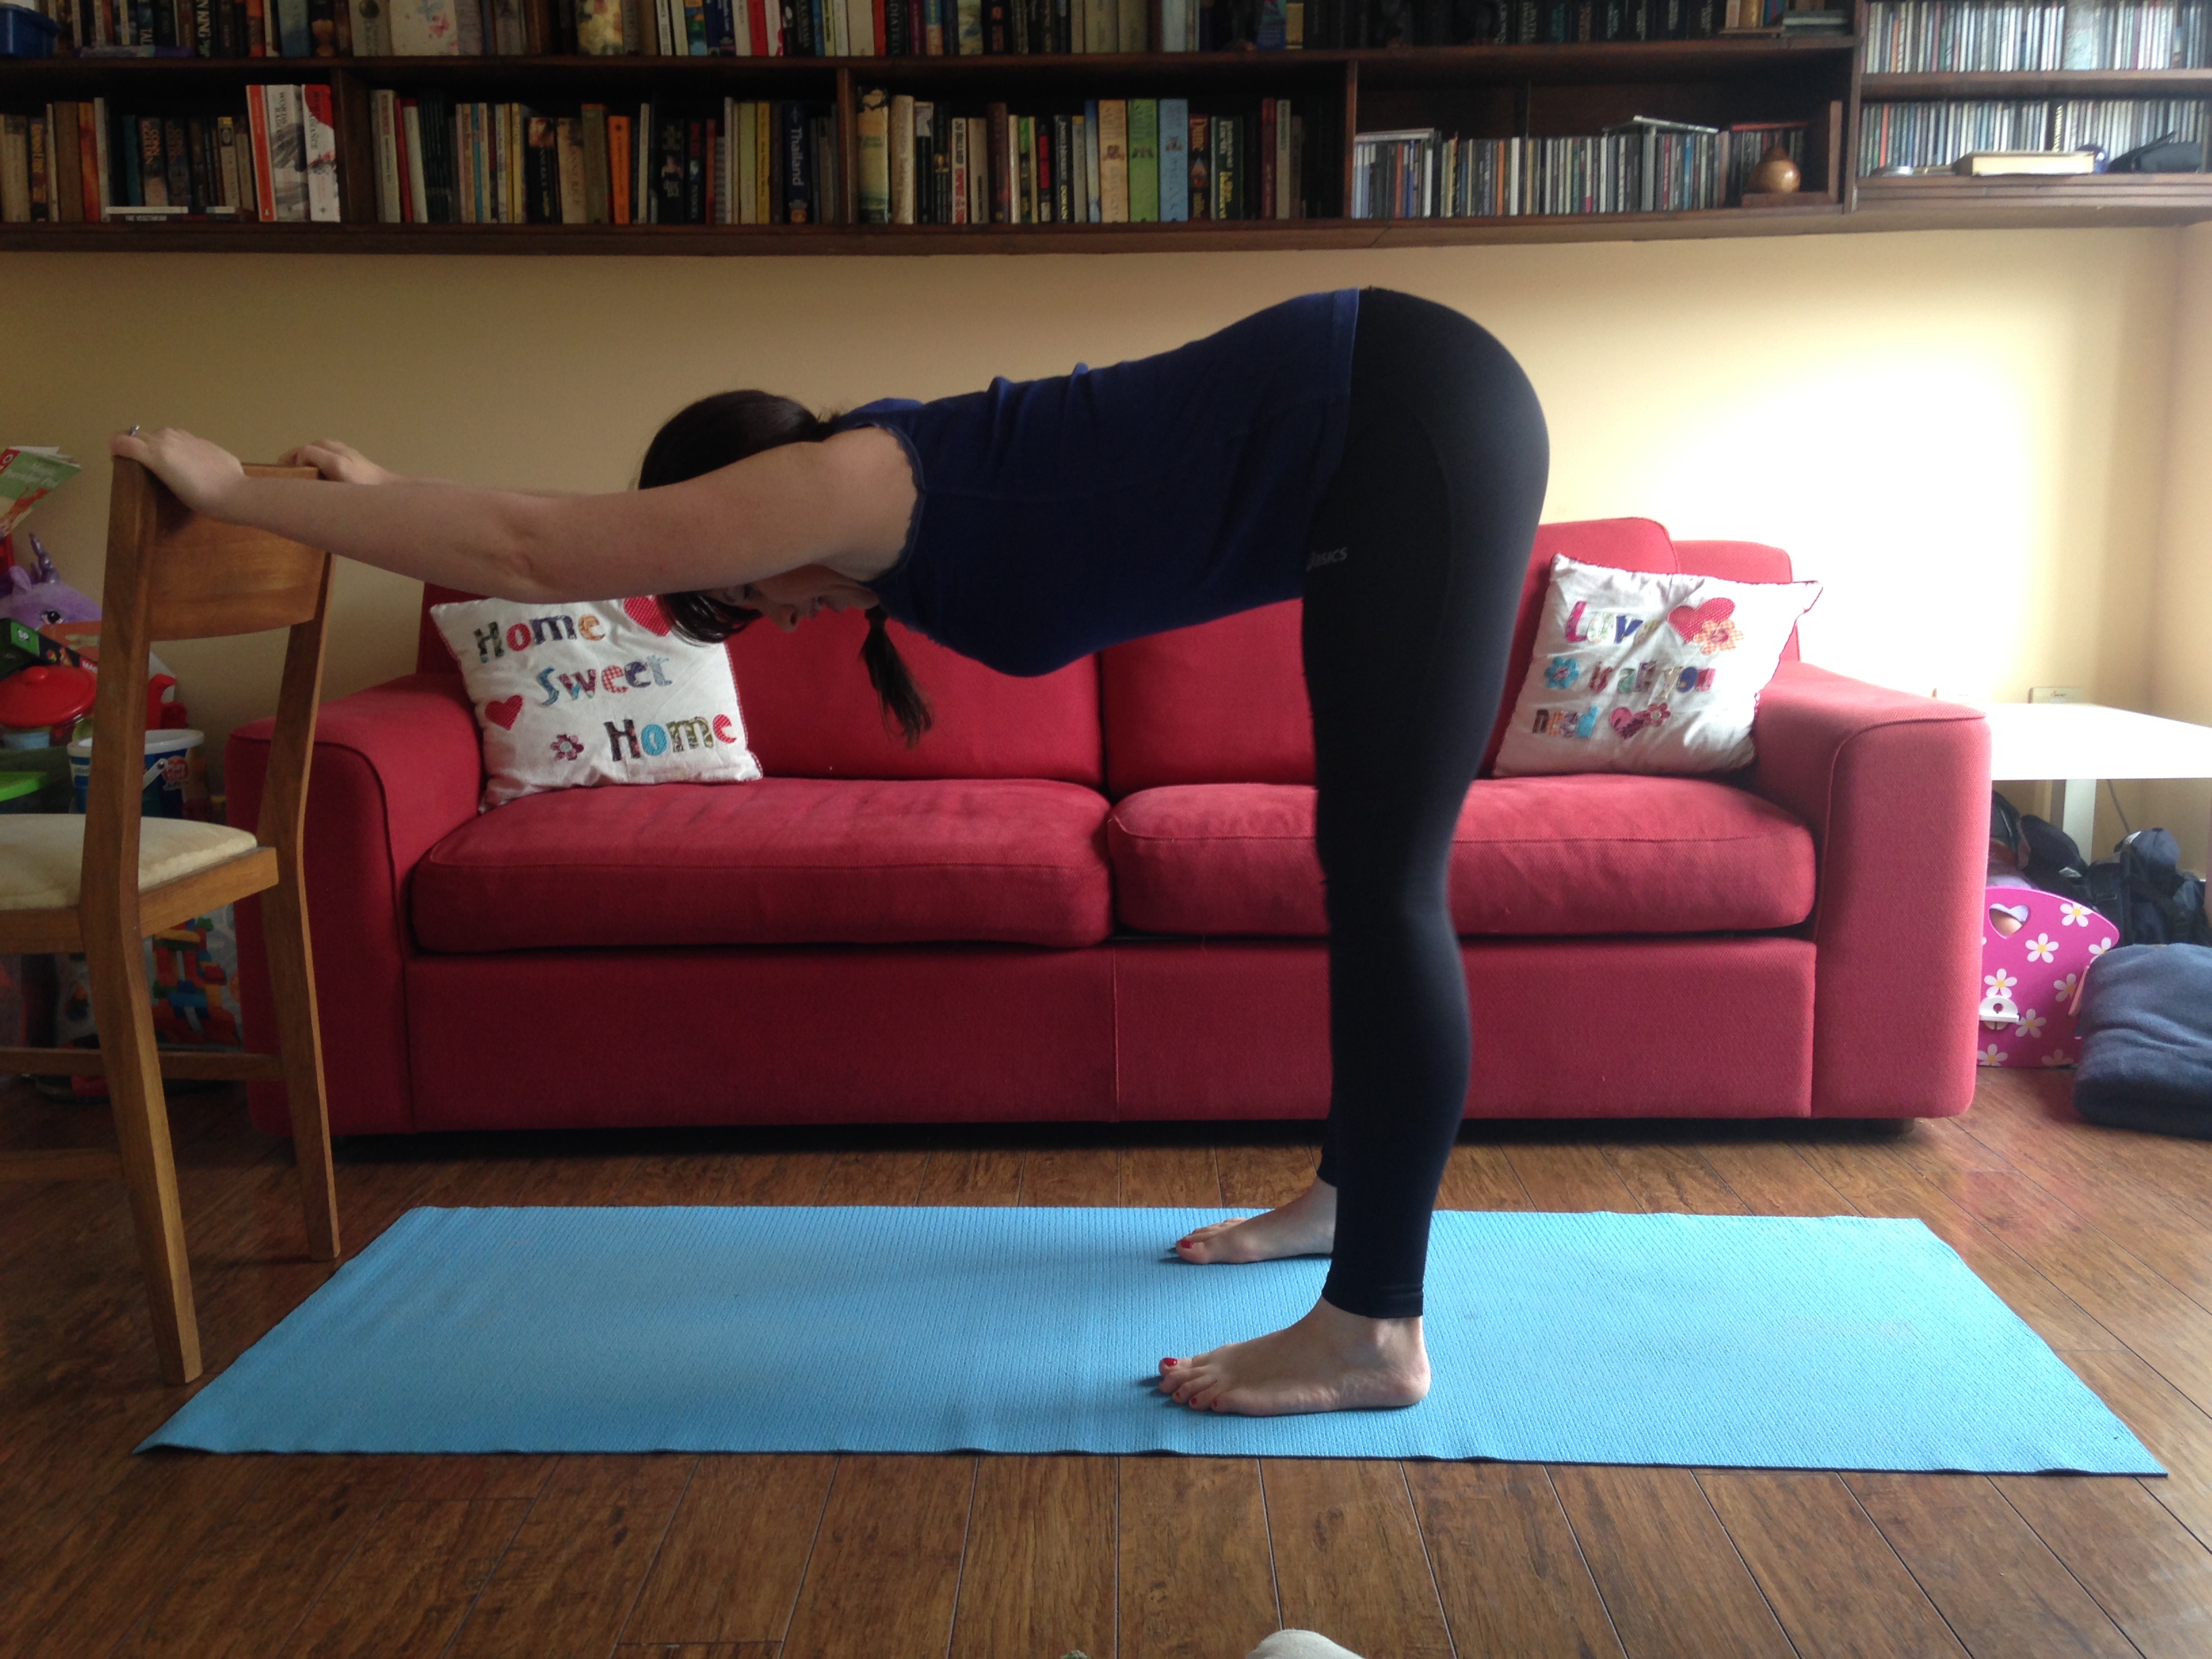
Alternate downward dog/ Hamstring stretch
Stand facing into a wall with your hands pressing into the wall, about shoulder distance apart.
Place your feet hip width apart and parallel to each other. Bend your knees a little or more if your feel its more comfortable on your lower back or hamstrings
Start to walk your hands down the wall, hinging forward from your hips and walking your feet away from the wall
Keep pressing the palms firmly into the wall while extending your hips away
Stop when your upper body is parallel to the floor (more or less)
Your ankles should be under your hips
Your head and neck should be in line with the rest of your spine
If your lower back and the backs of your legs are comfortable, straighten your legs, otherwise keep them bent.
Feel a nice stretch and release all along your spine and back muscles and down the backs of the legs.
When you want to come out again, start walking back into the wall
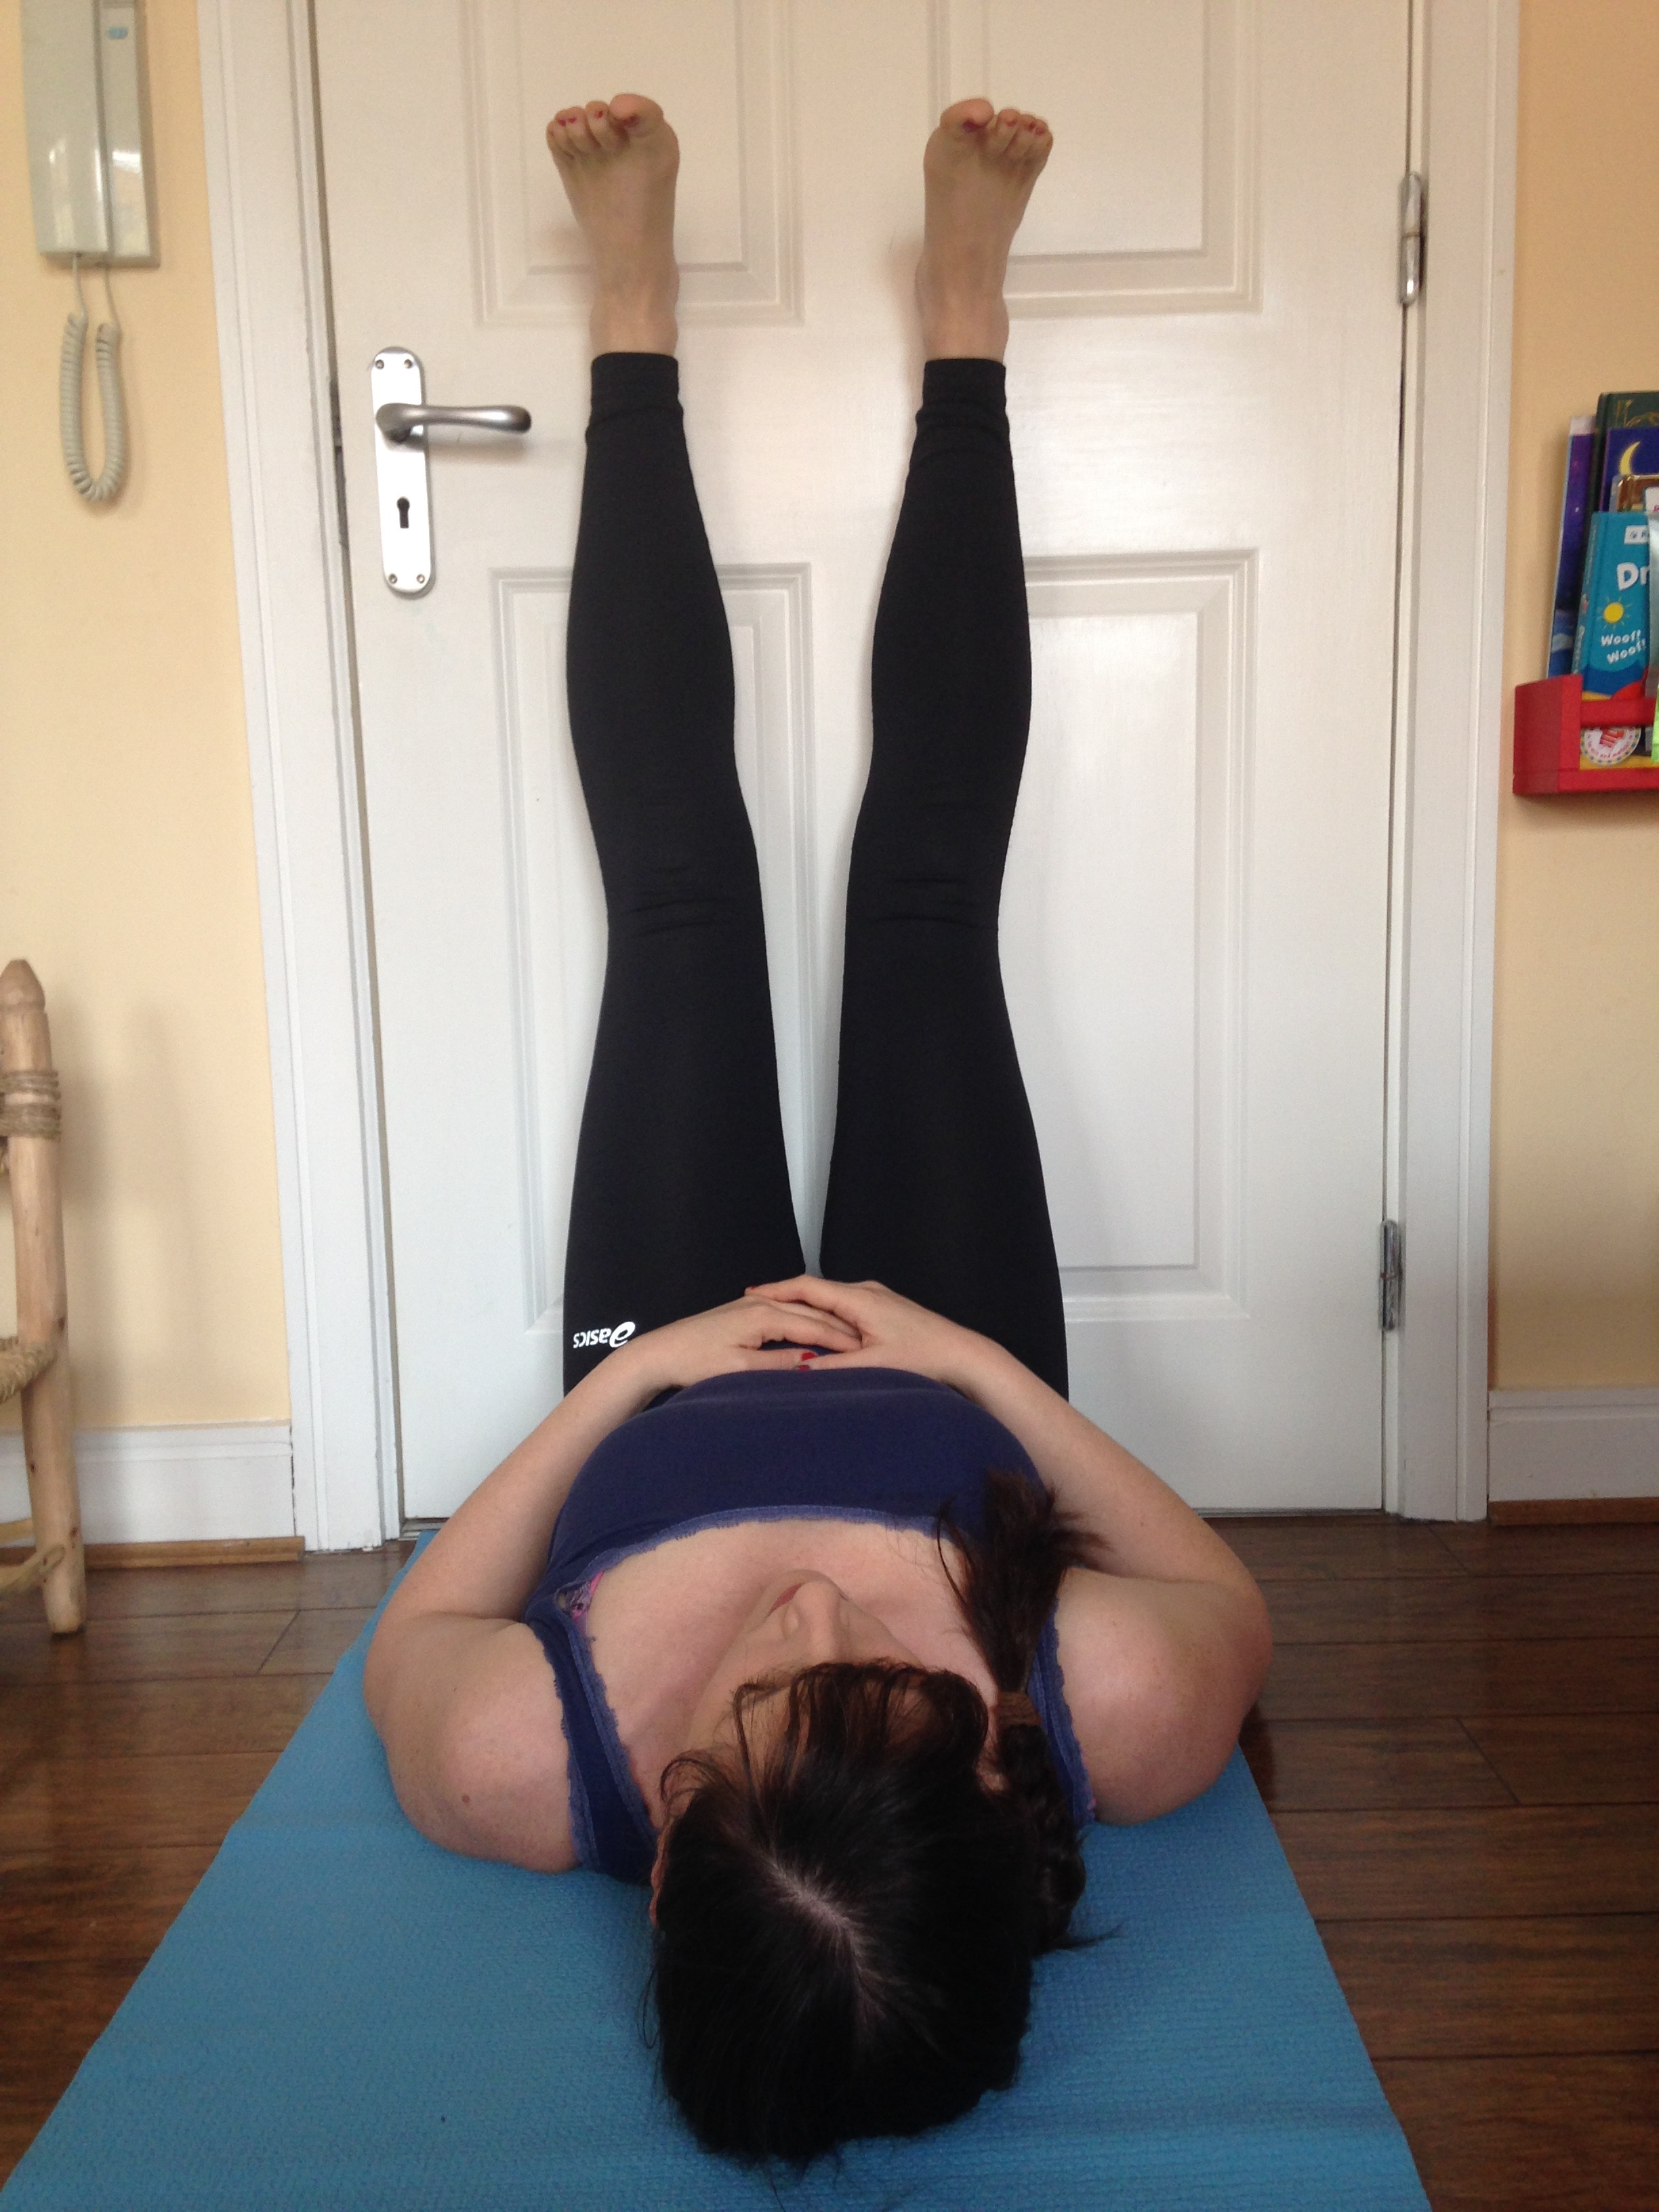
Finish this sequence with 5-10 mins of Legs up the wall pose.
Make sure you practice this pose on a soft surface so a bed is ideal.
If you feel any discomfort or dizziness in this pose just come out straight away.
The bum must be scooched right into the wall to completely relax and release the lower back
The heart will have to work much harder to pump blood to the lower legs so this has the added benefit of increasing the circulation and relieving tired and swollen legs.